Accounts
Go to Configuration ⇒ Accounts from the sidebar. Then seven settings will be there to configure, Options, Single Sign-On, User Verification, Password Strength, Roles, Permissions and Default Packages.
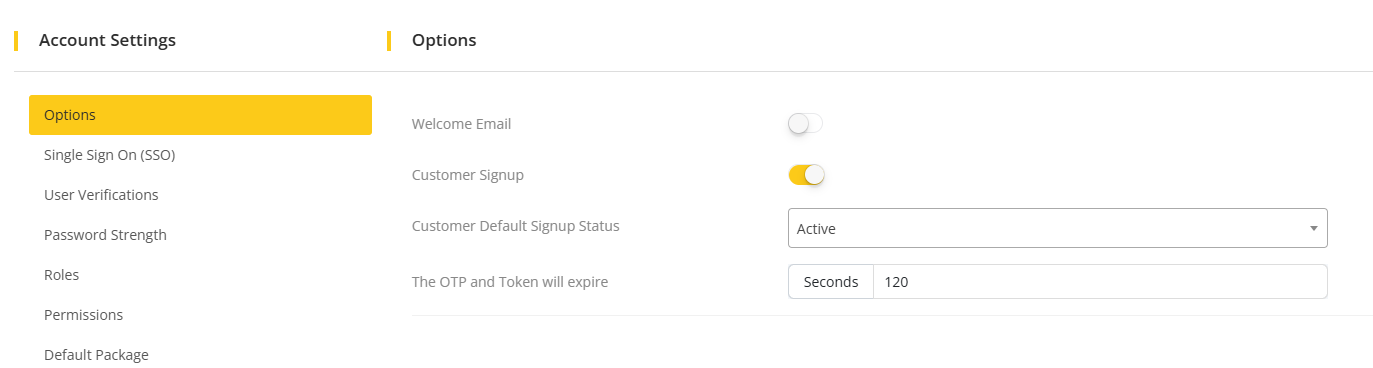
Options
Go to options, here four options are available.
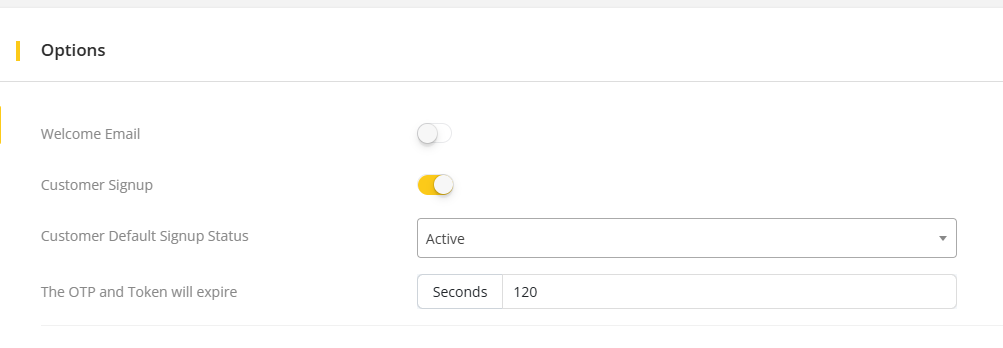
- Welcome Email: Enable this option to send welcome email to newly registered users.
- Customer SignUp: Enable this option to allow customer registration from the website.
- Customer default sign up status: Active and Pending status are available. Users will be verified during registration in the system with the selected sign-up status.
- OTP and Token Expiry: Provide the amount of seconds after which the generated OTP and Token will be expired.
SSO Service
Go to SSO service from the sidebar.
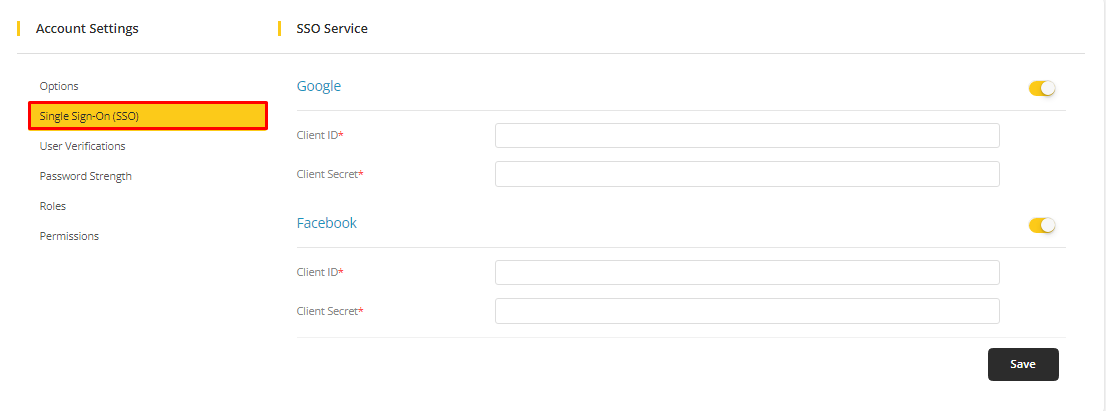
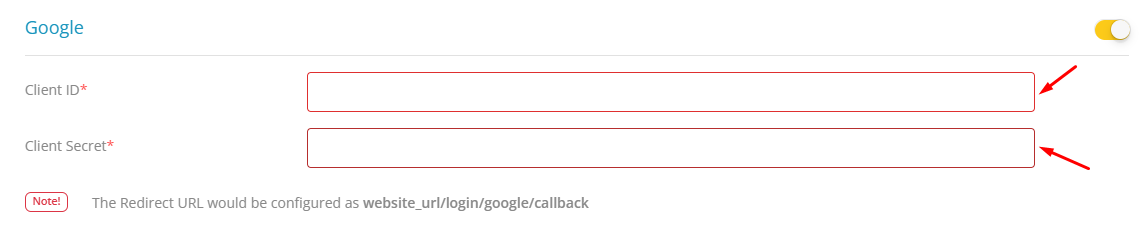
Configure Google API Settings
Firstly, enable the Google option and Generate a Google Client Id and Client Secret in order to use Google services on the SSO settings.
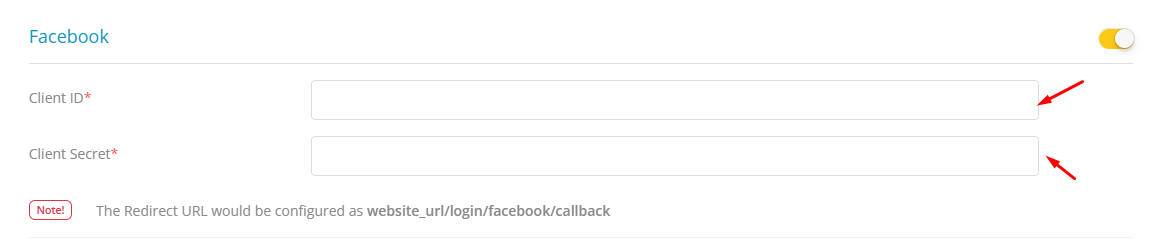
Configure Facebook API Settings
Firstly, enable the Facebook option and Generate a Facebook Client Id and Client Secret in order to use Facebook services on the SSO settings.
User Verification
Go to User Verification.
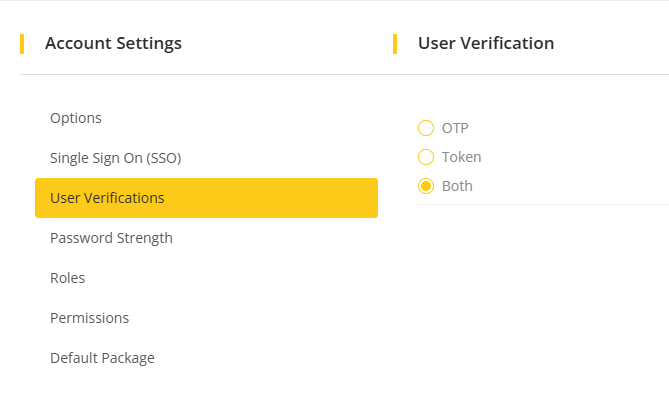
There are three ways to verify the users, OTP(one time pass), Token, and Both(OTP and token). Users will be verified during registration in the system with the selected verification way.
The user verification is needed when a user tries to register in the system and the Customer Default Signup status is set as Pending. Then the user also has to verify on Forger Password as well.
Password Strength
Go to Password Strength.
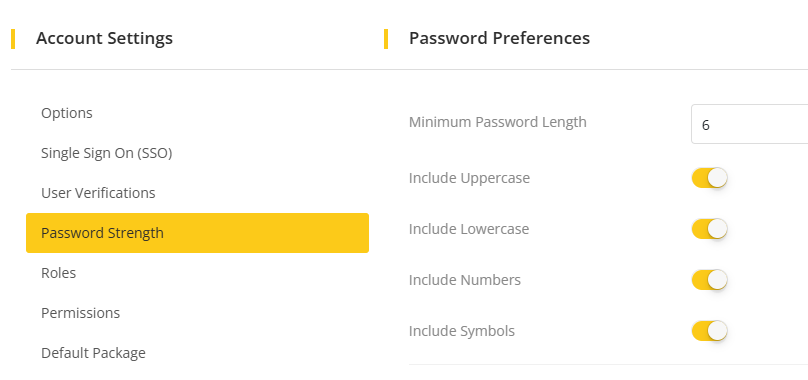
During the password creation process, the strength of the password will be assessed based on the activation of the available options. Feel free to activate any of the options and customize the minimum password length according to your preference, and click on Save to save the changes.
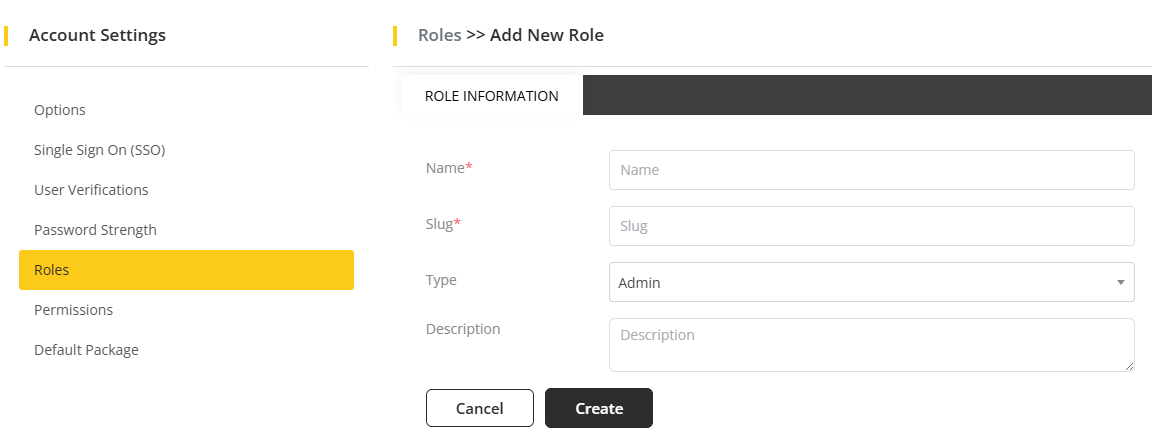
Roles
Go to Roles. Two roles are here - Admin & User.
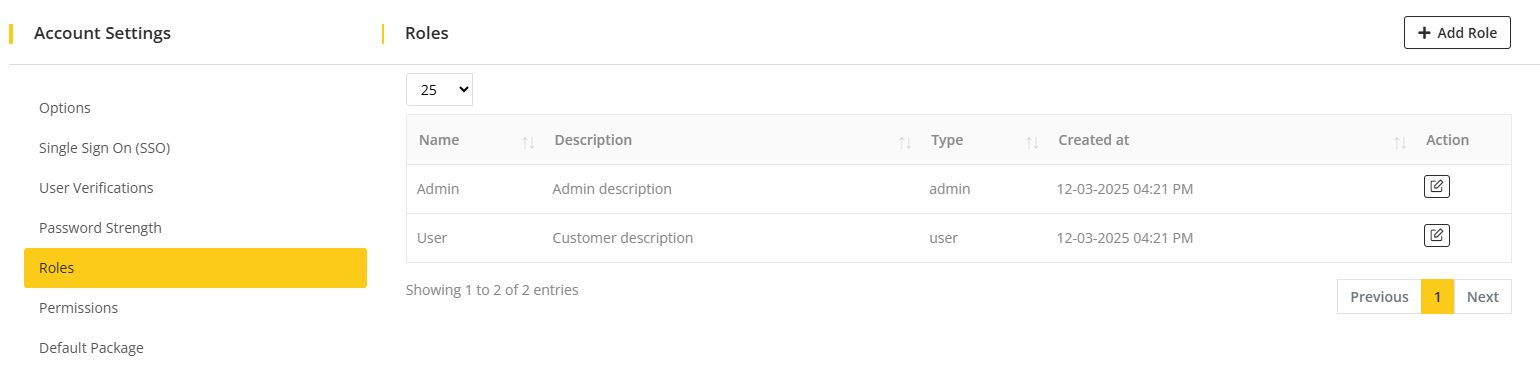
Here, Admin can add roles and edit roles.
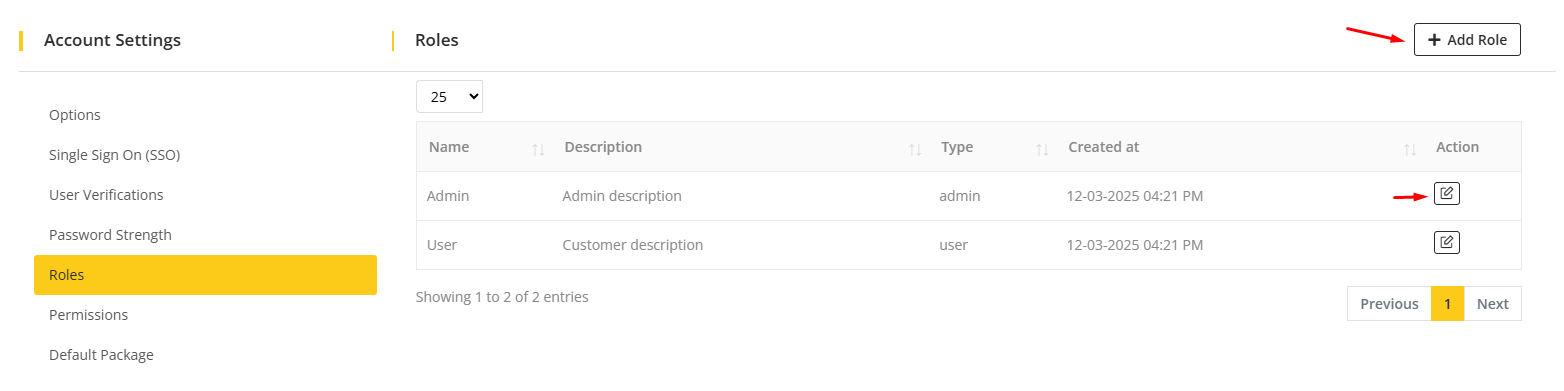
To add roles, click on Add Role button, and a form will appear. Fill the form with valid information and click on the Create button. After that, the role will be created successfully.
To edit roles, click on the Edit icon, and change the information according to your wish and click on the Update button. The information will be updated successfully.

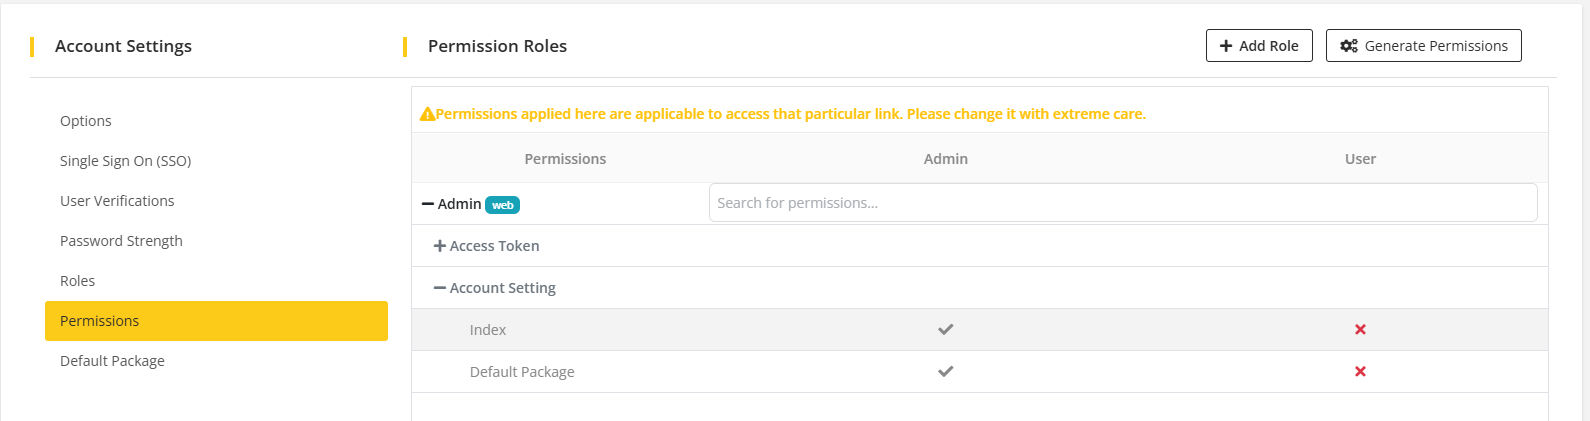
Permissions
Go to Permissions.
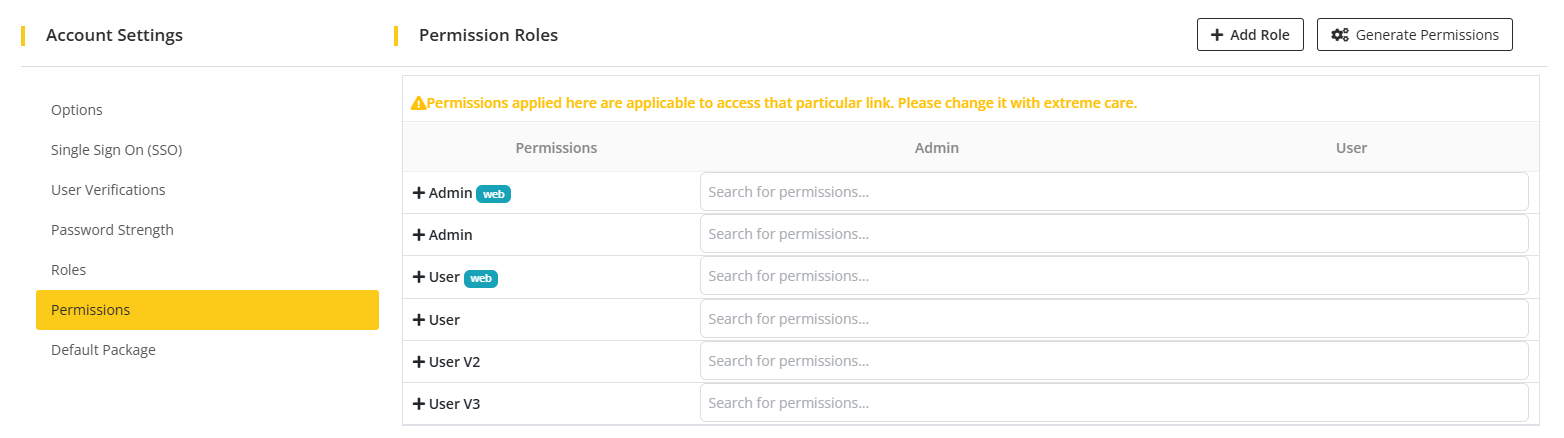
Every functional activity access can be determined by Admin. Admin can access everything in the system. His/her permission to access any activity can not be changed. But admin can change customers access permission accordingly.
Note
- Here, Cross(X) indicates permission denied and tick mark(✓) indicates permission accepted.
If a new activity/module is added to the system, then Click Generate Permission to generate the access permission for that activity/module. And permission can also be searched.

Default Package
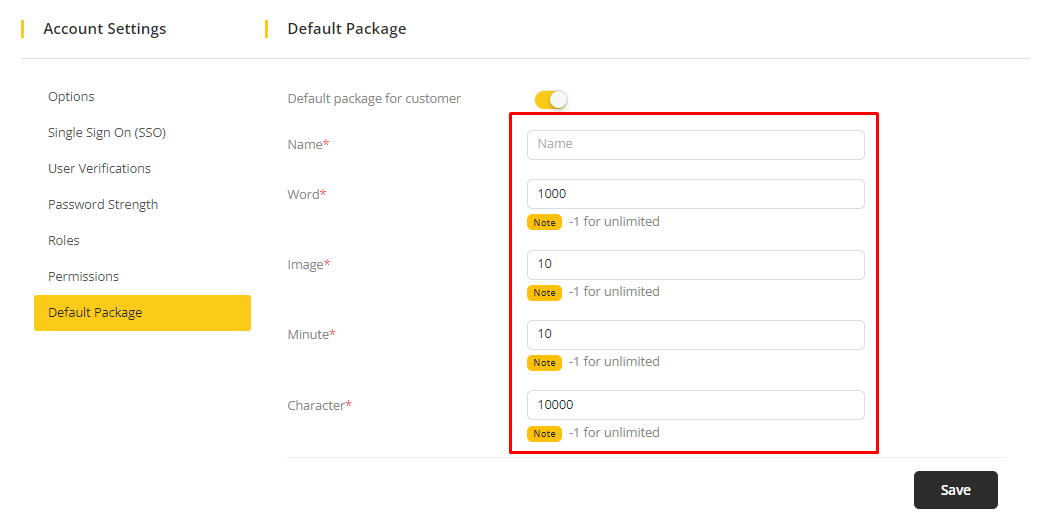
This feature will allow you to give a Registration bonus for generation content, image, character and audio to your newly registered customer. Using this you can give a bonus to your newly registered customer, not for already registered users.This is a one time plan included credit plan.
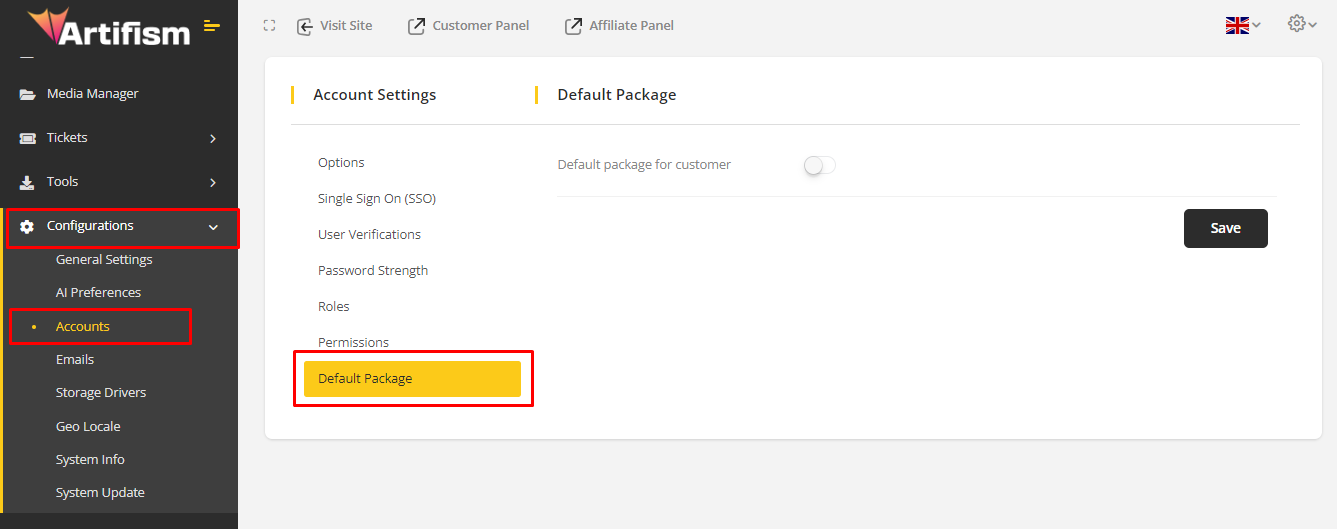
You can control this from Artifism’s admin panel. For this, go to Artifism’s admin panel ⇒ Configurations ⇒ Accounts. After that, Click on the Default Package tab to get the default package page.
Here initially the Default package for customers is switched off. You can disable/enable this feature by clicking on this switch button.
For the initial setup you need to switch on the Default package for customer. After that, you will see a form below. Here you need to set up a package as default for all newly registered users with a name and limits of features. After setting up click on Save button to save your changes.
Note
- If you switch off this feature after using several days. Your newly registered won’t get any registration bonus. But customers who already have this bonus can use their bonus.
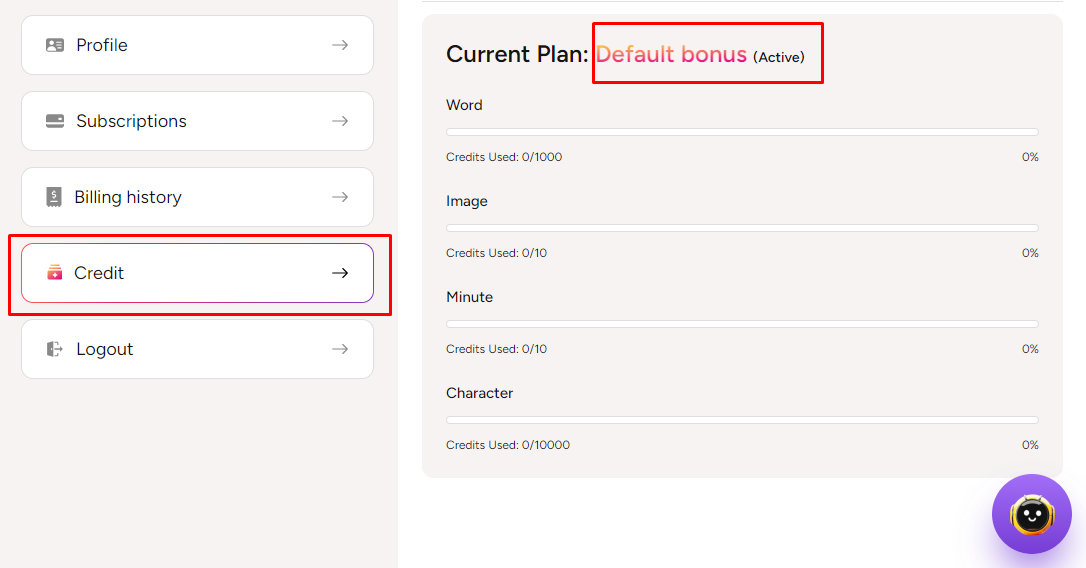
Customers who have a registration bonus. They can check their own balance from the Customer panel ⇒ Account ⇒ Credits. After having a Registration bonus. If a customer purchases a credit plan then the remaining balance of the registration bonus will be added with the purchased credit plan balance.
Note
- Registration bonus balance won’t merge with Subscription balance. If any user have both then system will reduce balance according to Balance Priority setting from admin.