Feature Preference
Ai Doc Chat
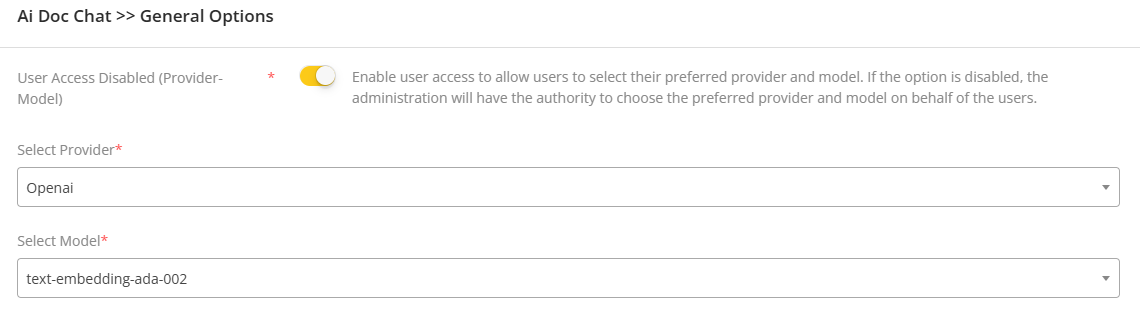
Here the admin can disable the user access to select their preferred provider and models. So, when the user access disabling option is enabled, the users will not be able to select any provider or models. If the option is disabled, then the users can choose their preferred provider and models to generate content through Document Chat and Web Chat. If the user access is disabled(user access disabling option is enabled) then the provider and model selected by the admin will work as default to generate content through Document Chat and Web Chat.
Chatbot
The chatbot feature preference has three sections which are- General Options, Theme Options and Settings. The admin can configure the preference of this feature from this options.
On the general option section, the admin can select all the languages that he wants the chatbot to use. The admin can even add dynamic languages to the available languages. Furthermore, the admin can select the default avatar of the chatbot. If any user does not provide any avatar for a chatbot then the default avatar will work as the avatar for that chatbot. Also the admin can upload the default floating image for the chatbot widget where the uploaded image will be displayed as default if the chatbot widget is integrated to any third-party website. The allowed extensions for default chatbot avatar and default floating image are jpg,jpeg,png and the maximum file size can be configured from Configurations>General Settings>Preferences.

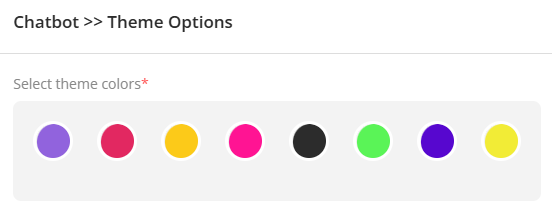
On the theme option section, the admin can select the theme colors which a user can use while customizing a chatbot. The admin can change the theme colors to any colors and thus it will reflect on the user panel.
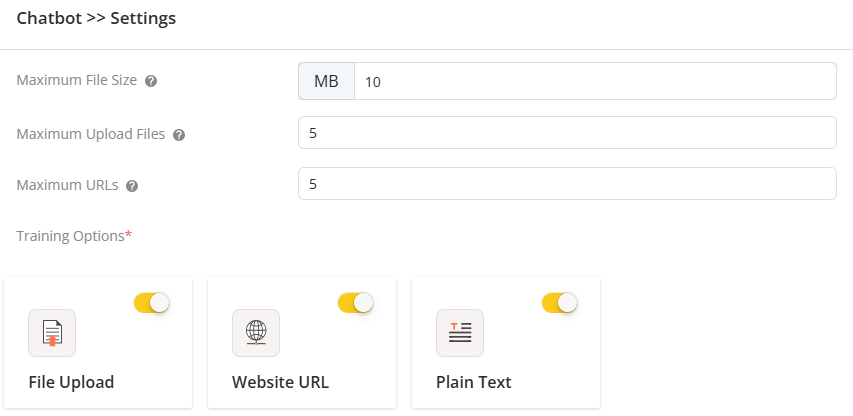
On the settings option, the admin can configure the settings related to the chatbot where the admin can select the maximum size for the uploaded documents to train the chatbot. Furthermore, the admin can select the maximum number of documents a user can upload to train the chatbot and also the maximum number of URLs that can be used to train the chatbot. Finally, the admin can enable or disable the available training options for the chatbot.
Ai Social Suites
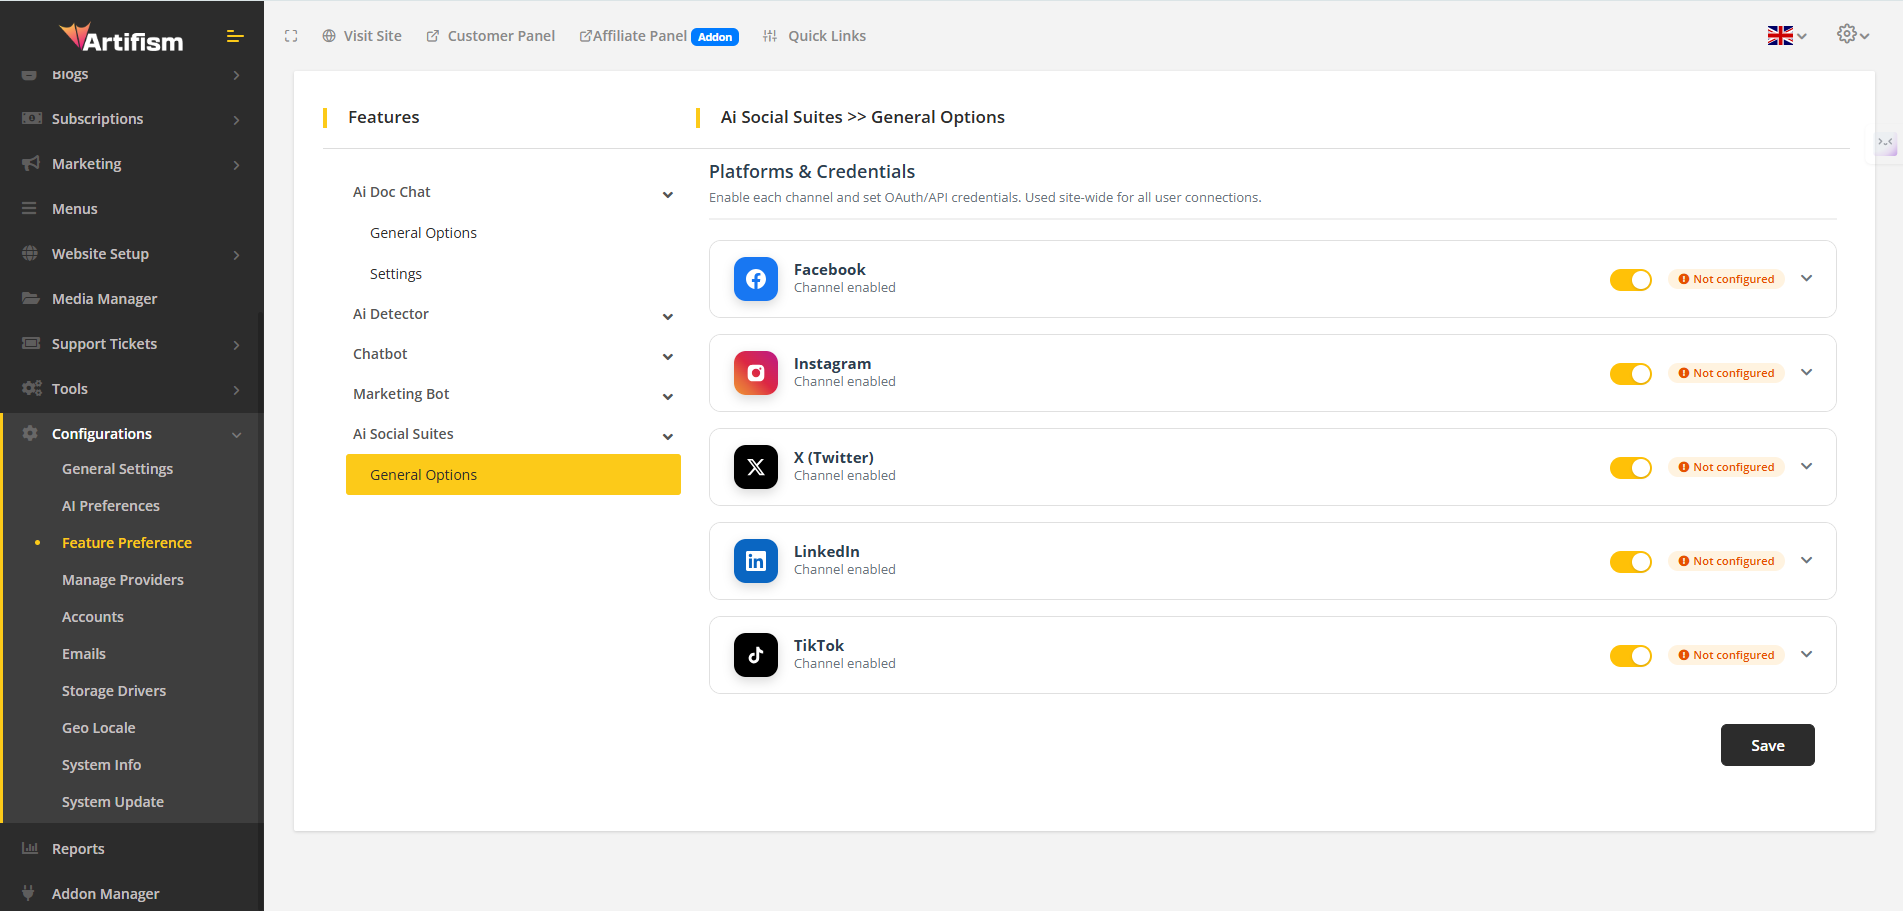
Go to Admin → Features → AI Social Suites → General Options. Here you can turn social channels on or off for your site and enter the OAuth/API credentials so users can connect their accounts and publish posts.
Platforms & Credentials
The Platforms & Credentials section lists each social channel (Facebook, Instagram, X (Twitter), LinkedIn, TikTok). For each one you can:
- Turn the channel on or off — Use the toggle. Only channels that are on are available for users to connect.
- See if it's set up — A Configured badge (green) means credentials are entered. Not configured (orange) means you still need to add Client ID and Client Secret.
- Enter credentials — Click the row (or the arrow) to expand it and fill in the fields.
After changing anything, click Save at the bottom of the page.
How to configure a channel
- Make sure the channel toggle is ON (enabled).
- Click the channel row to expand it.
- Enter Client ID and Client Secret from the platform's developer or app settings (e.g. Meta for Facebook/Instagram, X Developer Portal, LinkedIn Developers, TikTok for Developers).
- Redirect URL is shown read-only. Use the Copy button next to it, then paste this URL into your app's settings on the platform (as the callback or redirect URI). This must match exactly for OAuth to work.
- For X (Twitter) only: also fill in X API Key, X API Secret, Access Token, and Access Token Secret if your app uses them.
- Click Save.
Once Client ID and Client Secret are saved, the channel will show Configured instead of Not configured.
See Also: