Support Tickets
Support Ticket is a feature like messaging system between admin and customer. It will assist one step ahead for Artifism admin to connect with their valuable customers without using any other third party way.
Now, let's review the process of Support Ticket feature -
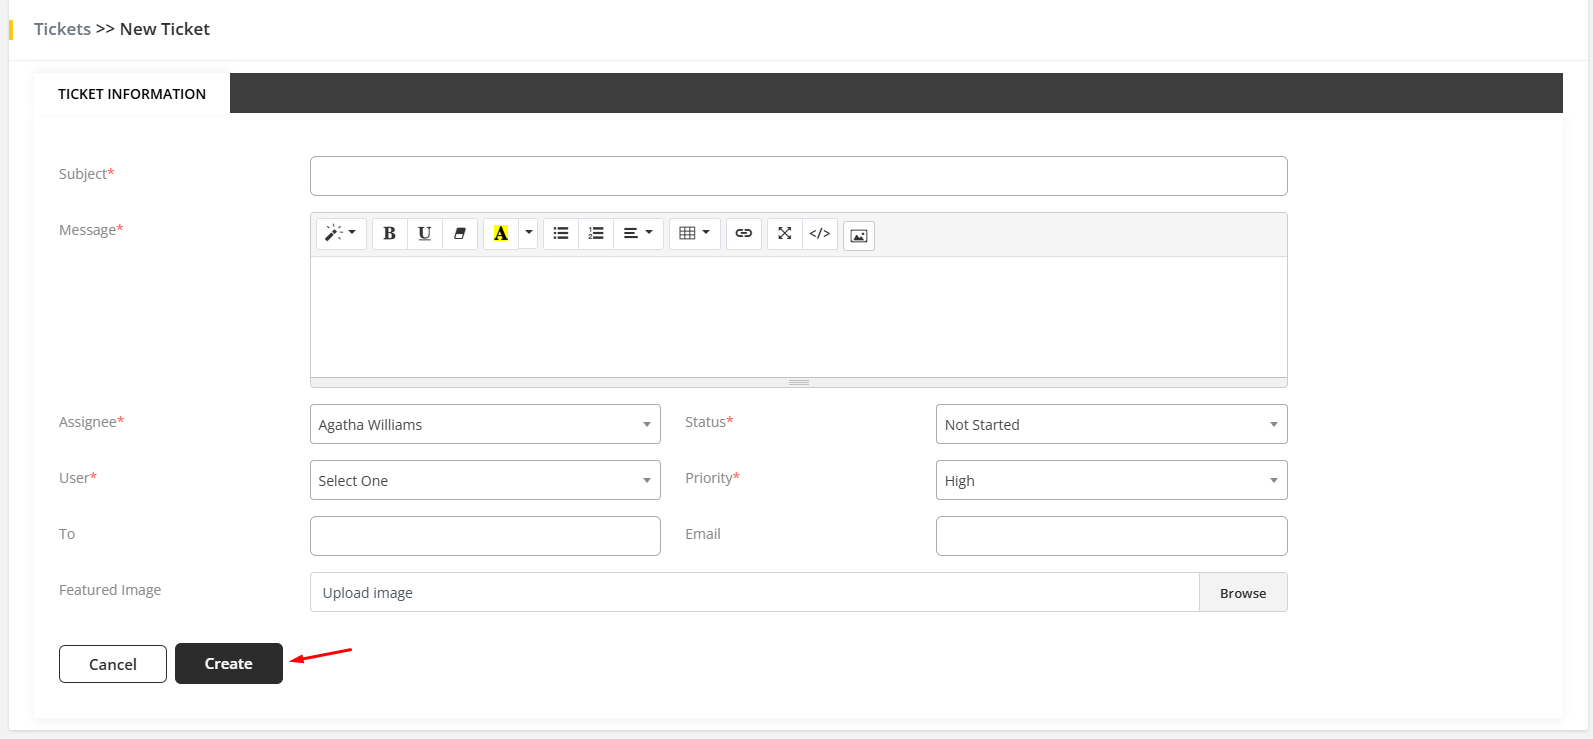
1. First of all, login to Artifism system’s admin panel and find the Tickets menu from the sidebar. Click on Add Ticket to create a new ticket for any customer. Here,admin can set a subject, message, feature image, status and priority according to the discussion topic and also need to select the user to whom admin wants to send a message. By selecting the user admin can define who is the creator of this specific chat and the assignee selected will be responsible in providing assistance to the queries of the creator.
2. Here is the list of all generated tickets. Admin can find this page by clicking on All Tickets sub-menu under the Tickets menu. Click on the Filter button if you want to filter any data using date range, assignee, status and keywords. From the list admin can change the status of any ticket by simply changing the specific status of a ticket. Click on a specific Subject if you want to reply to any ticket. Also there is an Edit button to edit ticket information. The admin can also add a new ticket from the Ticket List page by clicking on the Add Ticket button which will redirect the admin to the ticket creation page. The admin can also export the ticket list in CSV and PDF formats. The admin can also delete any specific ticket by clicking on the Delete button beside any specific ticket.

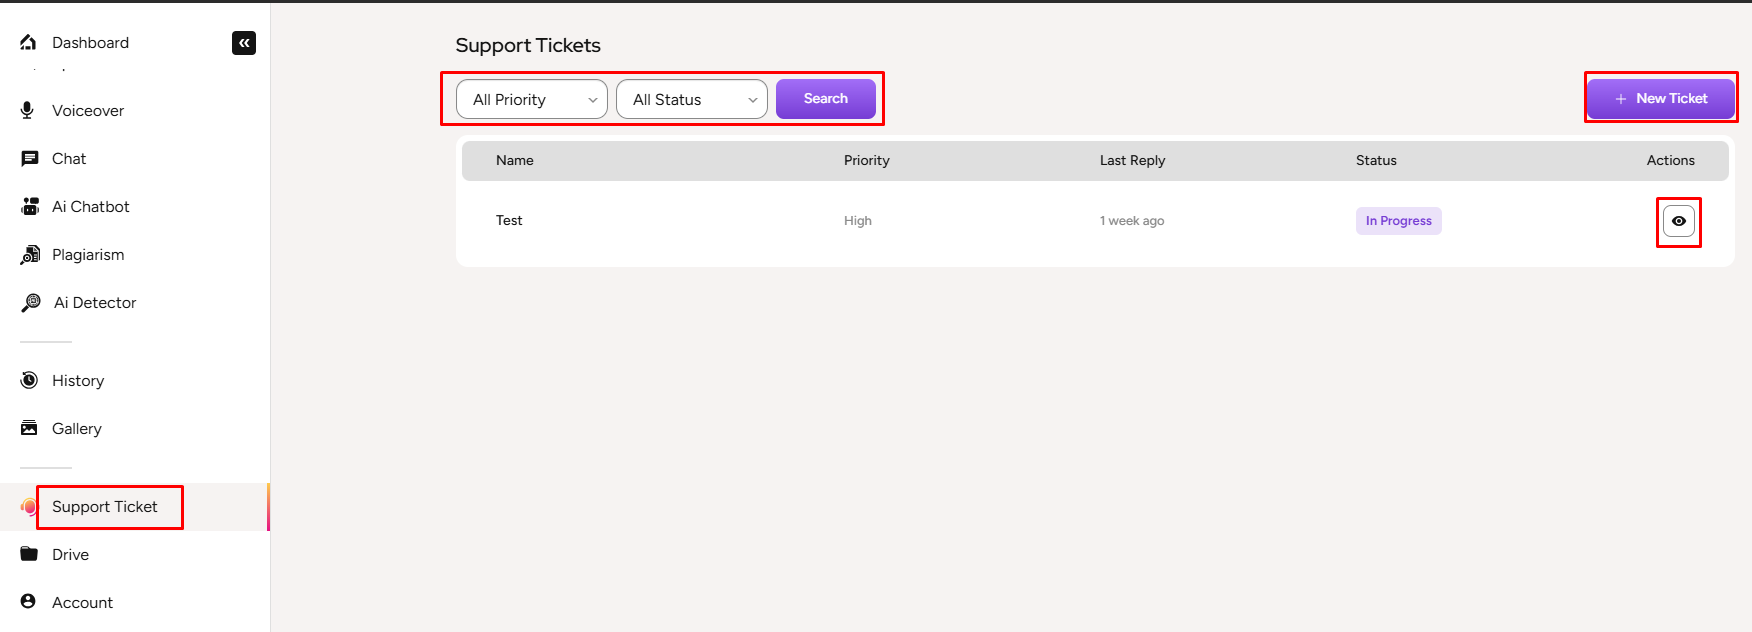
3. From the Customer panel click on Support Ticket to access admin messages. Here customers can find a list of tickets with admin or other assignees. Click on a specific eye button to reply to a ticket. There is a search option above to search data from the list using Priority and Status. Also there is a New Ticket button click on it to start a new ticket with admin.
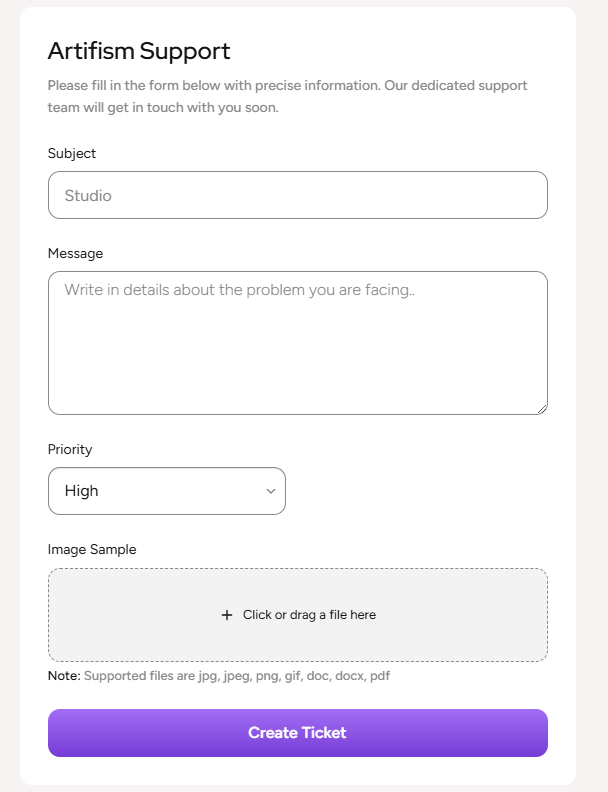
4. In the New Ticket page customers can ask any queries to admin. Here customers need to write a Subject, Message, set a Priority and attached Files if any. Then click on Create Ticket to start a new ticket. It is recommended for the users to check the file types before uploading any attachments while creating a new ticket.
5. In the Ticket Reply page, customers can see Subject, Priority and Status on the left side and on the right side showing the list of chats of this ticket. Below chat customer can write his/her new reply message and can attach required files. After that click on the Reply button to send a reply to the admin.
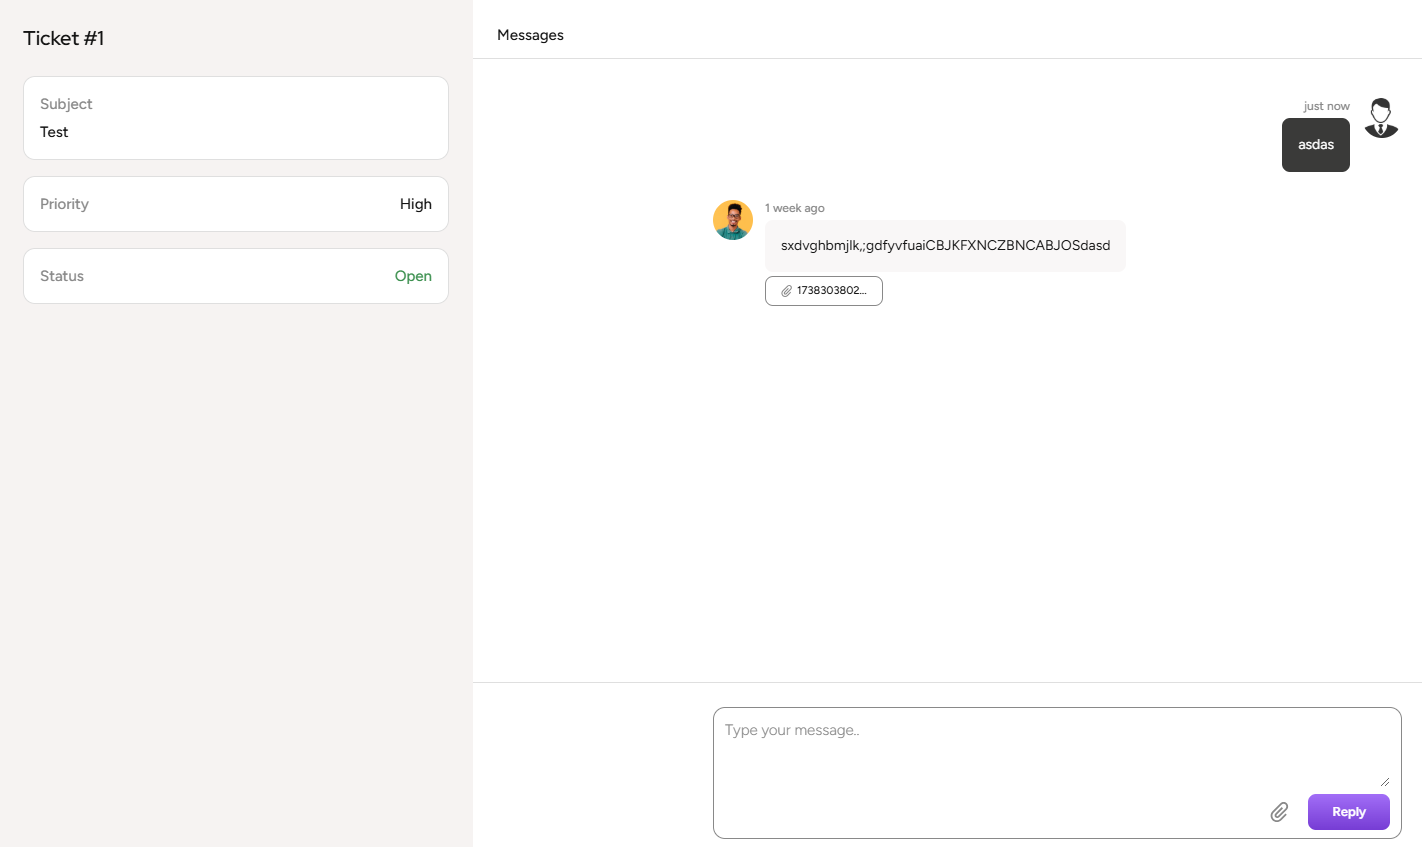
Once a ticket has been replied either from the customer end or the assignee end, the other person can see the updated message by going to the ticket details.