Marketing Bot Documentation
Introduction
Marketing Bot helps you create, manage, and track marketing campaigns across WhatsApp and Telegram platforms. Send messages, manage contacts, create segments, and track performance metrics all in one place.
What you can do:
- Create and schedule campaigns for WhatsApp and Telegram
- Manage contacts and organize them into segments
- Track campaign performance with analytics
- Respond to customer messages through the inbox
- Automate replies with AI-powered responses
Prerequisites:
- Active user account
- WhatsApp Business API credentials (for WhatsApp campaigns)
- Need help setting up? See WhatsApp Cloud API Setup Guide
- Telegram Bot Token (for Telegram campaigns)
- Need help creating a bot? See How to Create a New Telegram Chatbot
Getting Started
Before creating campaigns, you need to:
- Configure Settings - Set up WhatsApp and Telegram API credentials
- Add Contacts - Import or manually add contacts
- Create Segments (Optional) - Organize contacts into groups
- Sync Templates (WhatsApp only) - Get approved templates from WhatsApp
Settings Configuration
Configure your WhatsApp and Telegram integrations before creating campaigns.

Configure WhatsApp
Before you start: You need an active WhatsApp Business API account with approved message templates.
Need to set up WhatsApp Cloud API?
If you haven't set up your WhatsApp Business API account yet, follow our comprehensive guide: WhatsApp Cloud API Setup Guide
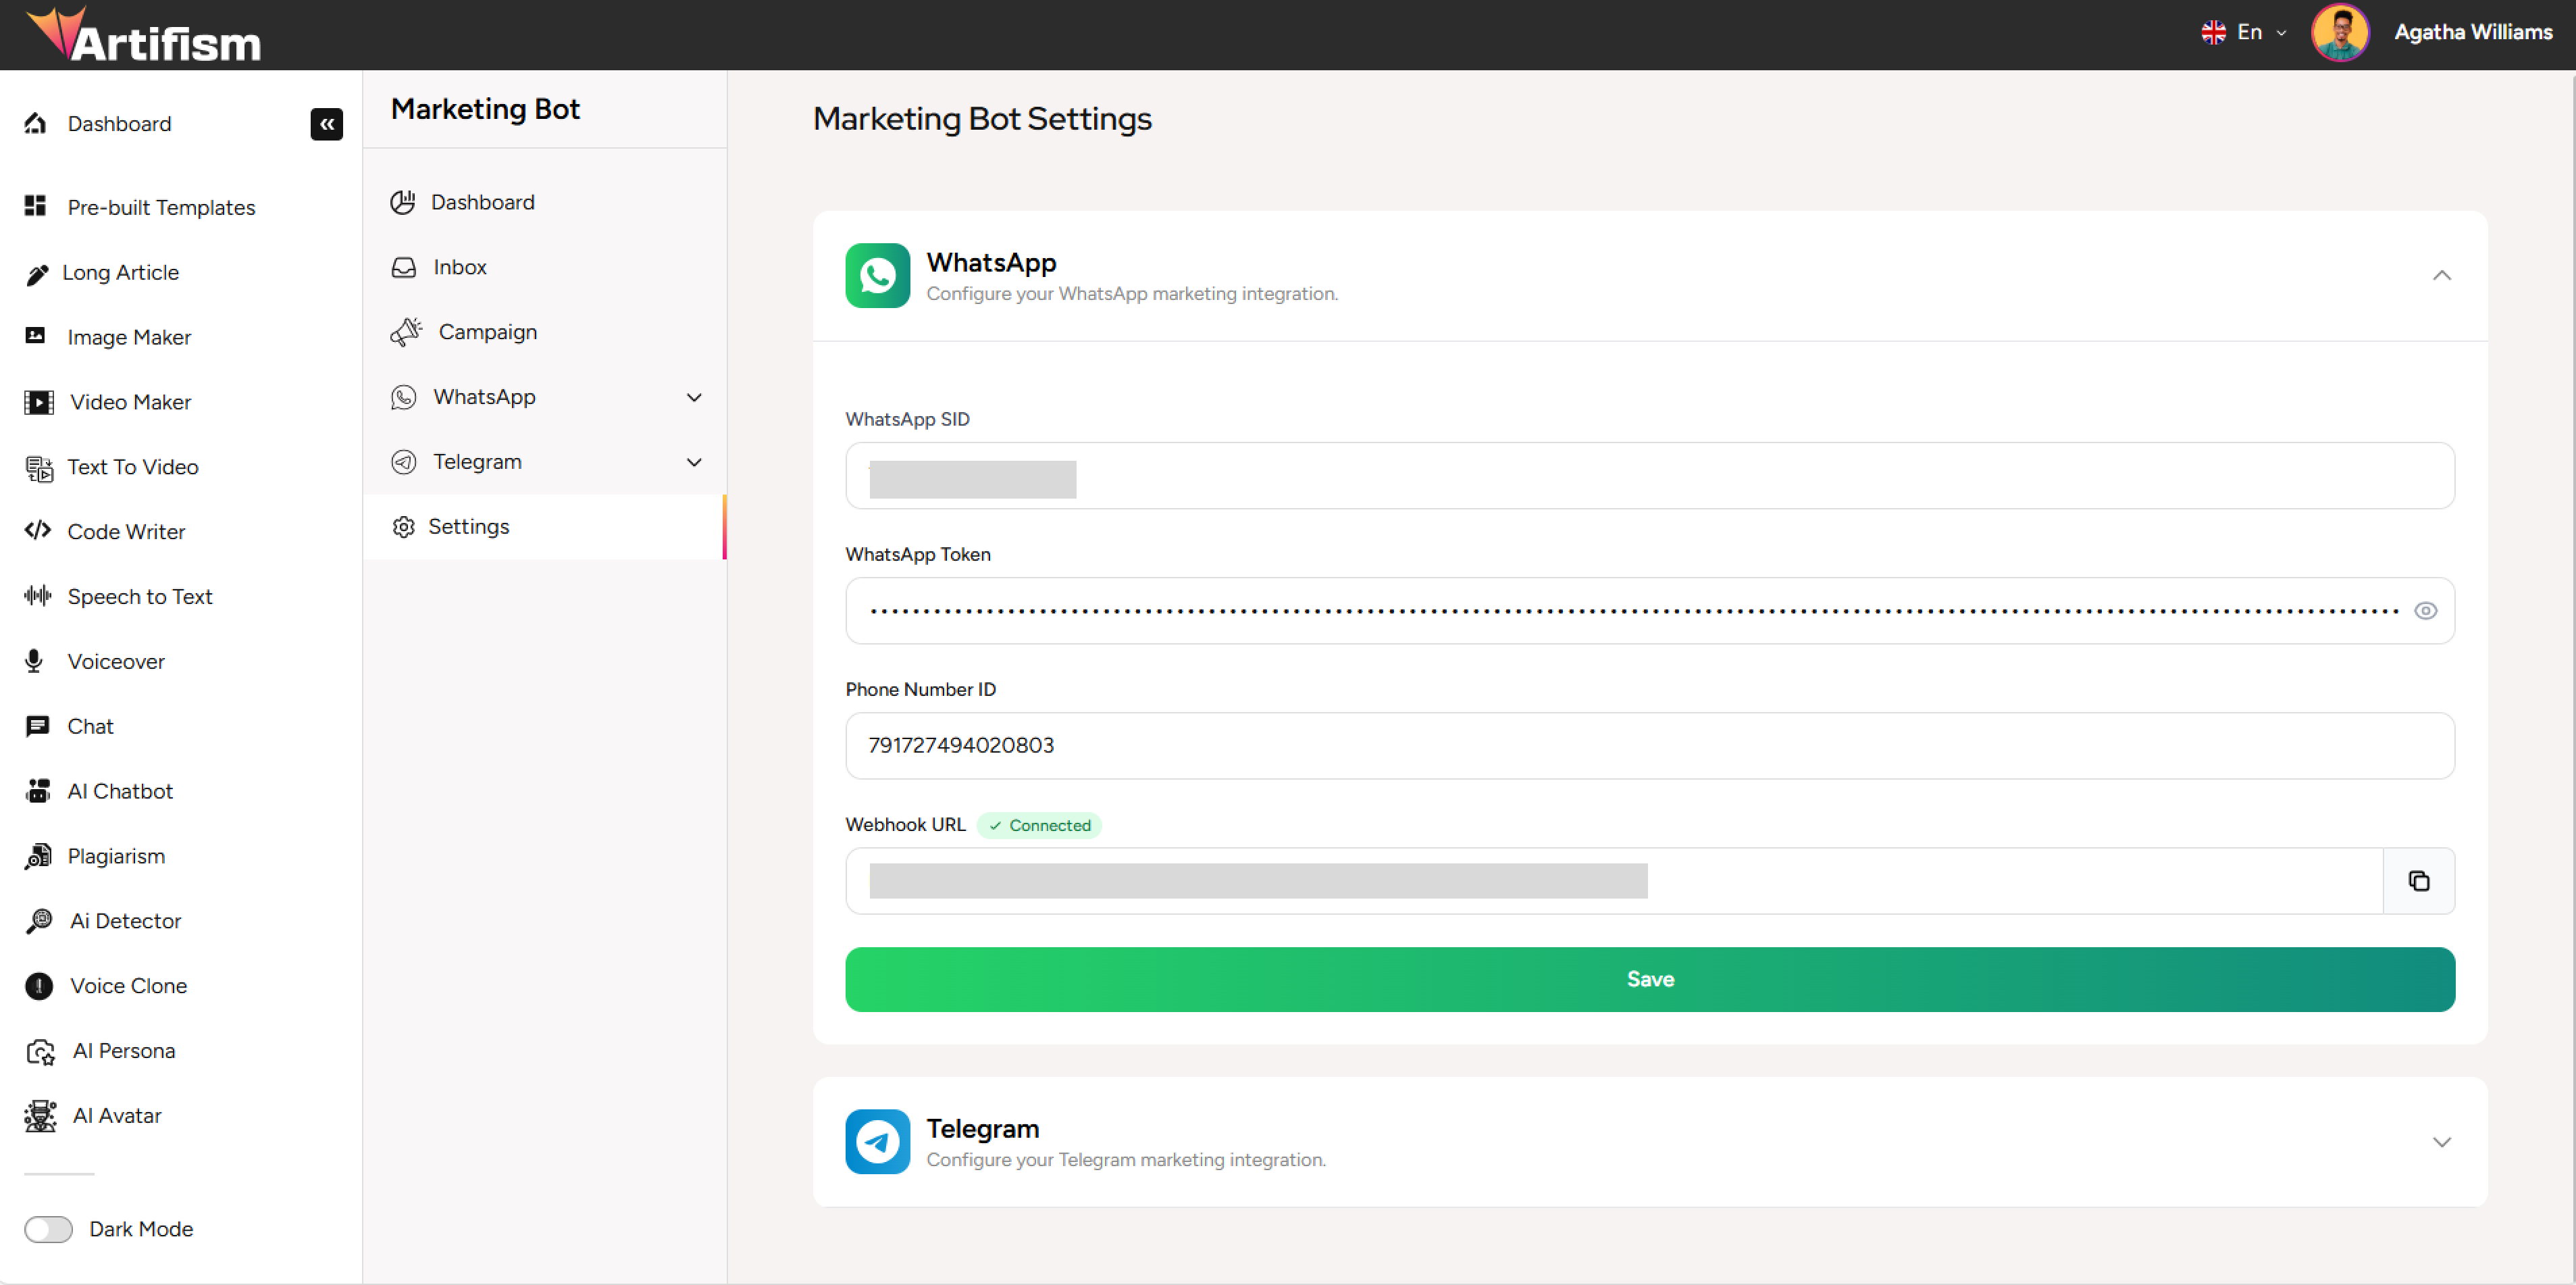
Step-by-step setup:
- Navigate to Settings from the sidebar
- Click to expand the WhatsApp section
- Enter your credentials:
- WhatsApp SID - Your Account SID from Cloud API
- WhatsApp Token - Your authentication token (click eye icon to show/hide)
- Phone Number ID - Your WhatsApp Business Phone Number ID
- Copy the Webhook URL using the copy button and set the URL in the WhatsApp webhook setup
- Configure webhook in your Cloud API dashboard:
- Go to your Cloud API dashboard
- Navigate to webhook settings
- Paste the webhook URL
- Verify the connection (you should see a green status indicator)
- Click "Save" button
- Wait for the success confirmation message
Important: Make sure your WhatsApp templates are approved before syncing.
Configure Telegram
Before you start: Create a Telegram bot using @BotFather on Telegram.
Need to create a Telegram bot?
If you haven't created your Telegram bot yet, follow our step-by-step guide: How to Create a New Telegram Chatbot
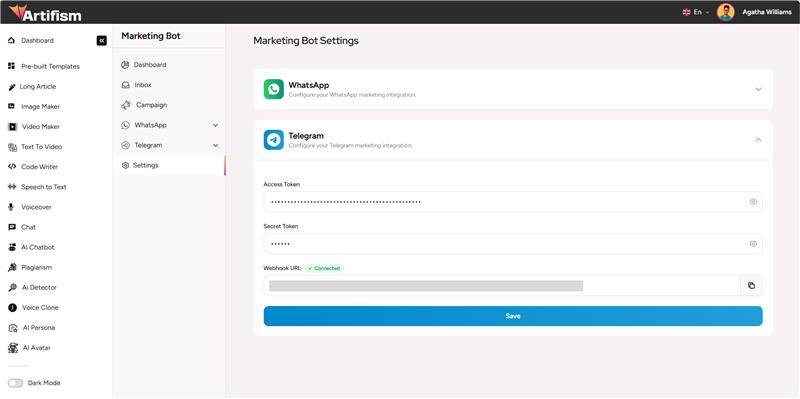
Step-by-step setup:
- Create a bot on Telegram (or use an existing bot):
- If you need to create a new bot, follow the Telegram Chatbot Setup Guide
- Open Telegram and search for @BotFather
- Send
/newbotcommand - Follow instructions to create your bot
- Copy the bot token provided
- Navigate to Settings from the sidebar
- Click to expand the Telegram section
- Enter your credentials:
- Access Token - Paste the bot token from @BotFather
- Secret Token - Create a secure random string (e.g., use a password generator)
- Copy the Webhook URL using the copy button
- Set up webhook using Telegram Bot API:
- Use the Telegram Bot API endpoint:
https://api.telegram.org/bot<YOUR_TOKEN>/setWebhook - Include the webhook URL and secret token
- Verify connection (you should see a green status indicator)
- Use the Telegram Bot API endpoint:
- Click "Save" button
- Wait for the success confirmation message
Note: Your bot must be added to Telegram groups manually before you can send group campaigns.
Campaign Queue Setup (Cron Job)
To ensure your Marketing Bot campaigns queue works properly on your server, you need to set up a Cron Job on your shared or VPS hosting server. The cron job processes scheduled campaigns and ensures they are sent at the correct time.
🔗 Campaign Queue Cron Setup Guide
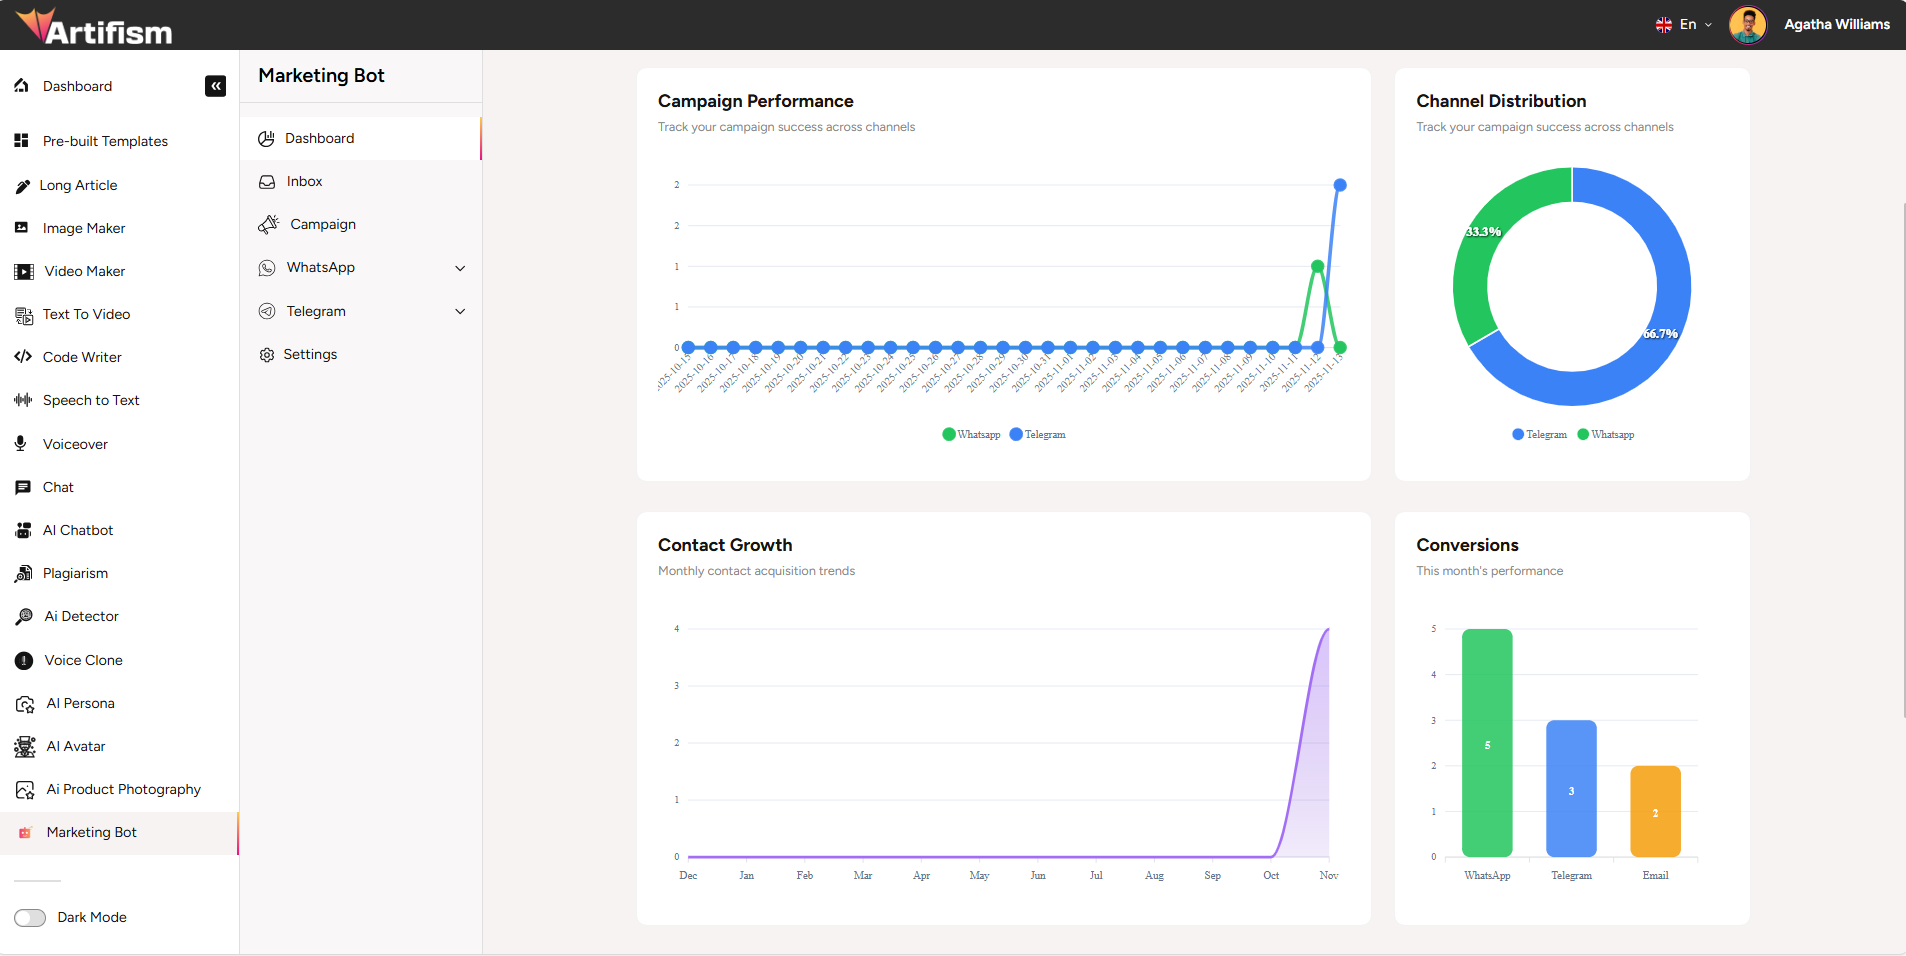
Dashboard
The dashboard provides an overview of your campaigns, metrics, and performance analytics.
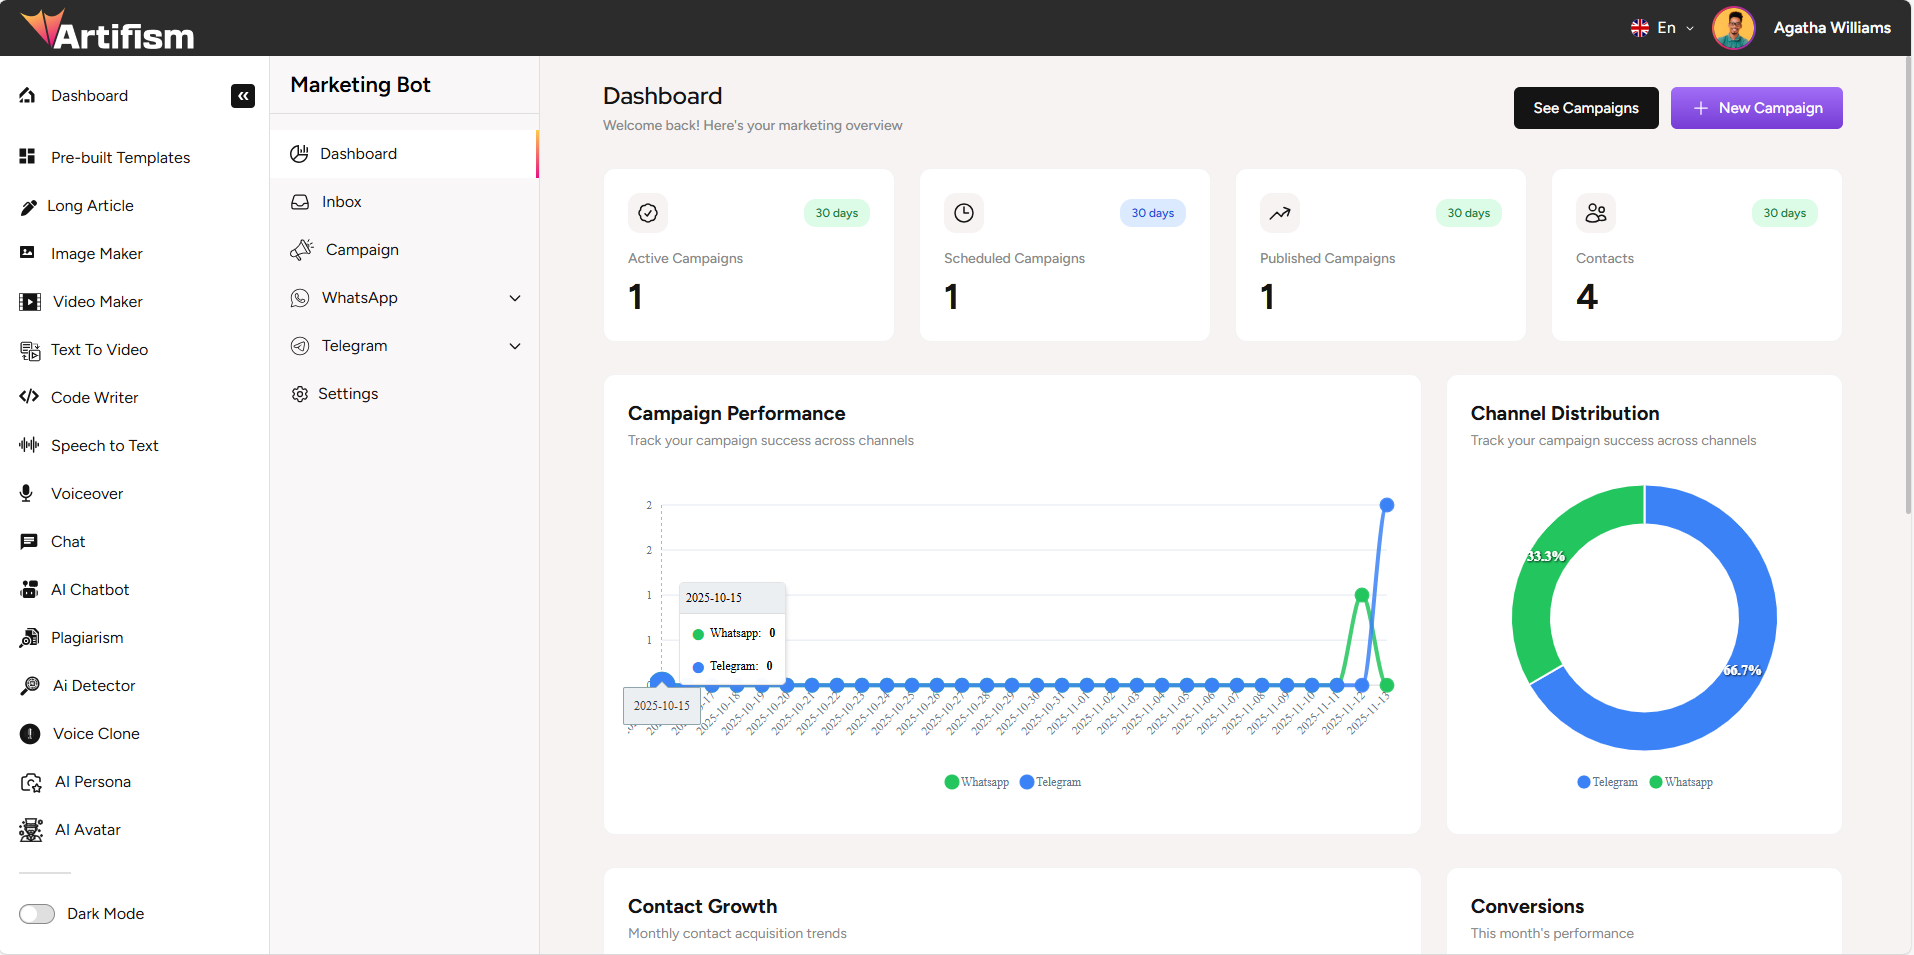
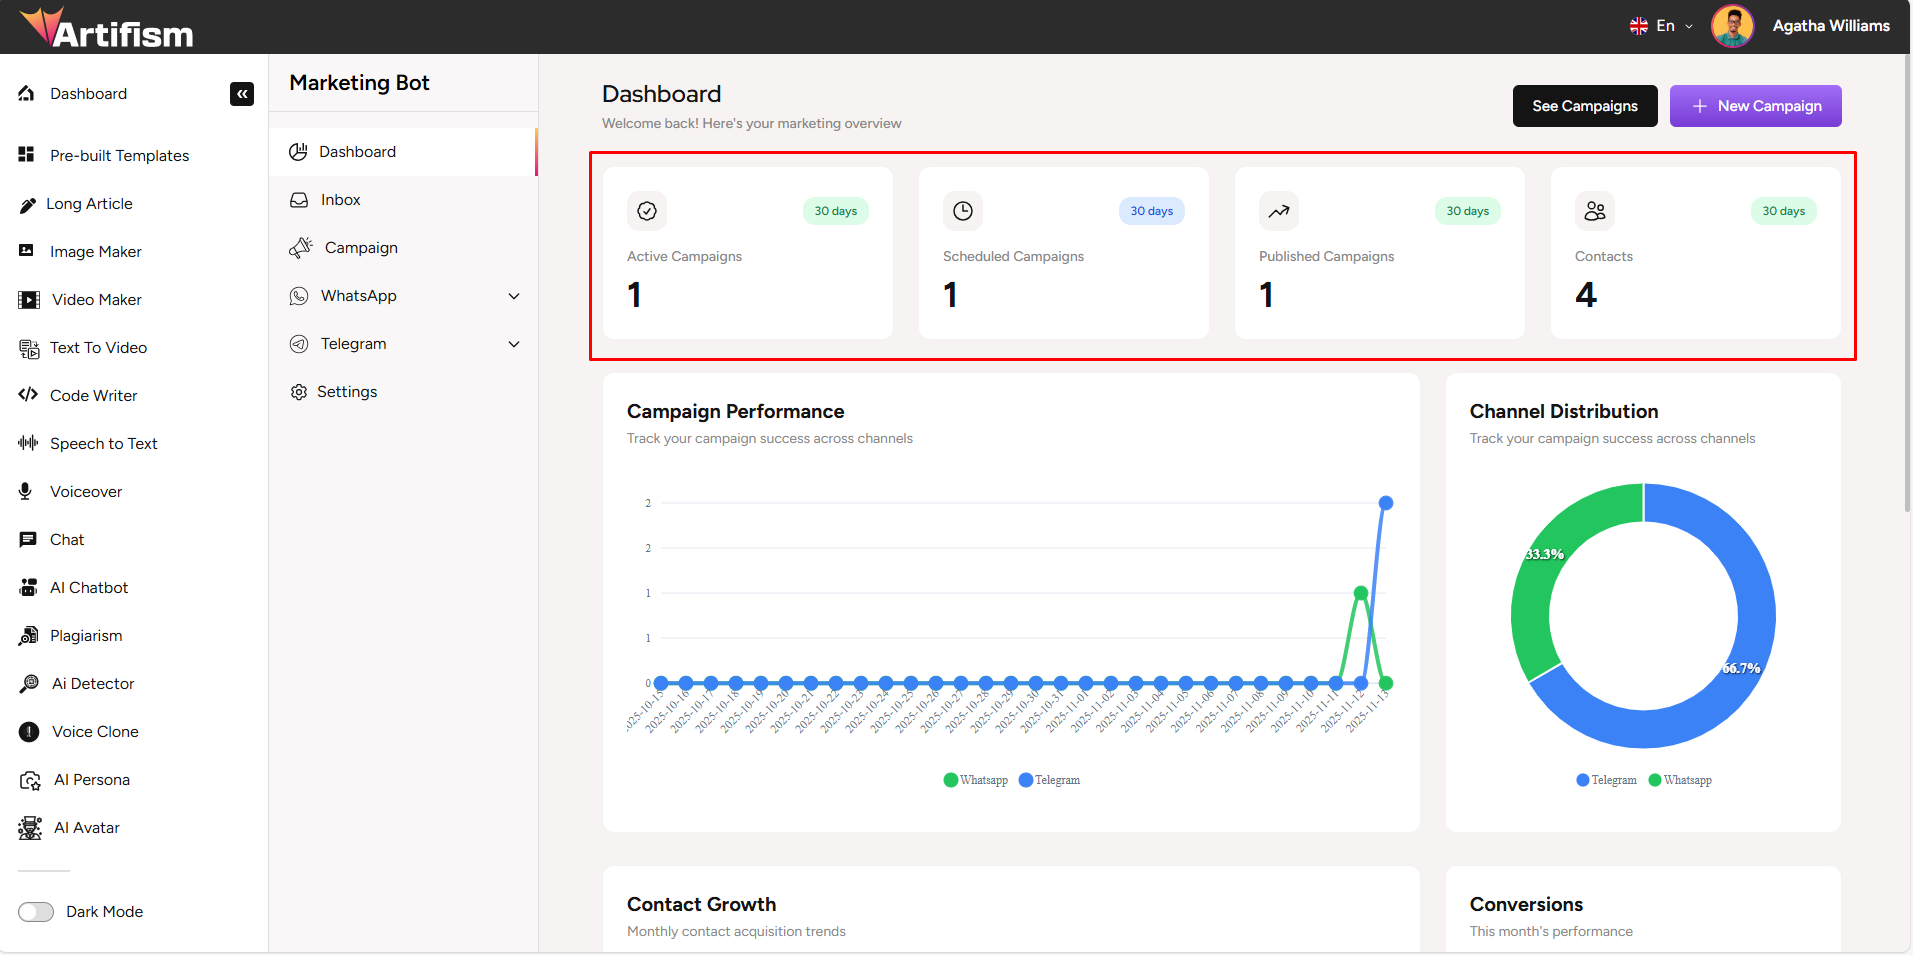
Key Metrics
The top section displays four key performance indicators:
- Active Campaigns - Currently running campaigns (last 30 days)
- Scheduled Campaigns - Campaigns scheduled for future delivery (last 30 days)
- Published Campaigns - Completed campaigns (last 30 days)
- Contacts - Total number of contacts in your database
Charts and Analytics
Campaign Performance Chart
- Interactive line chart showing campaign performance over time
- Use the time range selector: Last 7 Days, Last 30 Days, or Last 90 Days
Channel Distribution Chart
- Donut chart showing campaign distribution across WhatsApp and Telegram
Contact Growth Chart
- Area chart displaying monthly contact acquisition trends
Conversions Chart
- Bar chart showing monthly conversion performance
Recent Campaigns
The table at the bottom shows your most recent campaigns with: - Campaign ID and Name - Status (Running, Scheduled, Published, Completed) - Platform (WhatsApp/Telegram) - Schedule Date/Time - Actions (Delete button)
Quick Actions:
- Click "See Campaigns" to view all campaigns
- Click "New Campaign" to create a new campaign
- Click the delete icon to remove a campaign

Campaigns
Create, manage, and monitor your marketing campaigns.
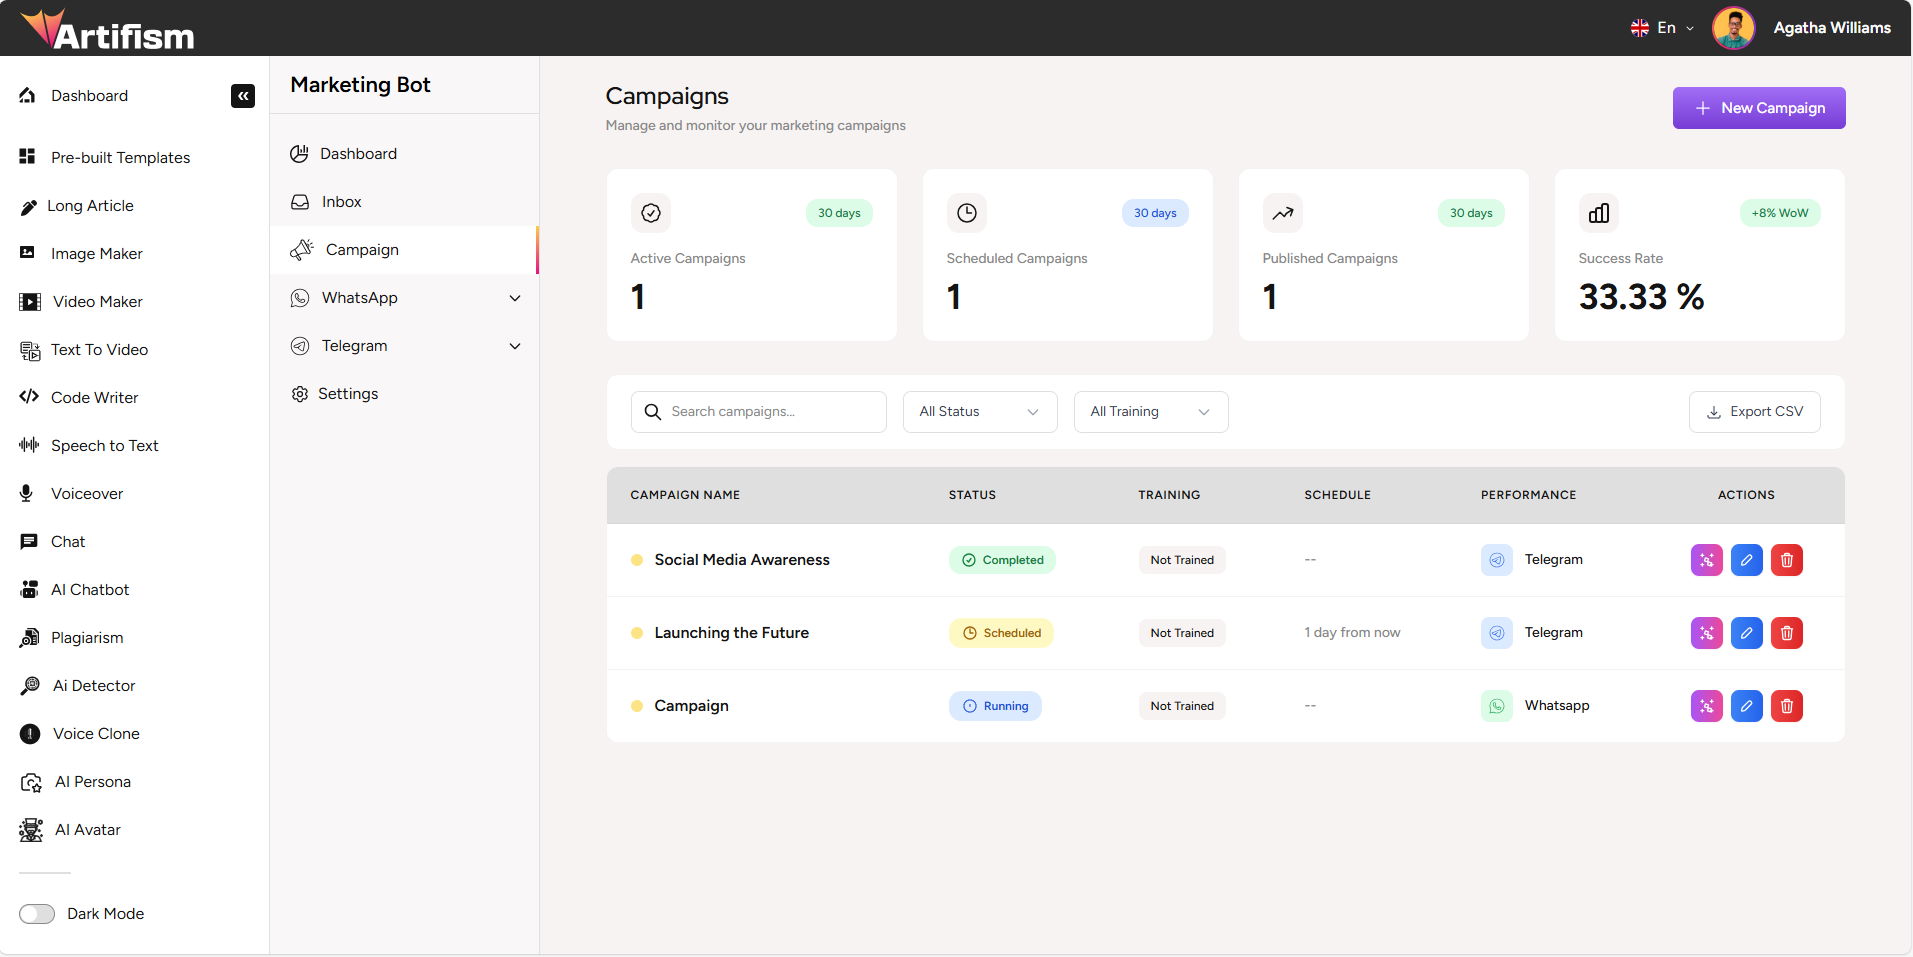
Campaign Overview
KPI Cards:
- Active Campaigns count
- Scheduled Campaigns count
- Published Campaigns count
- Success Rate percentage
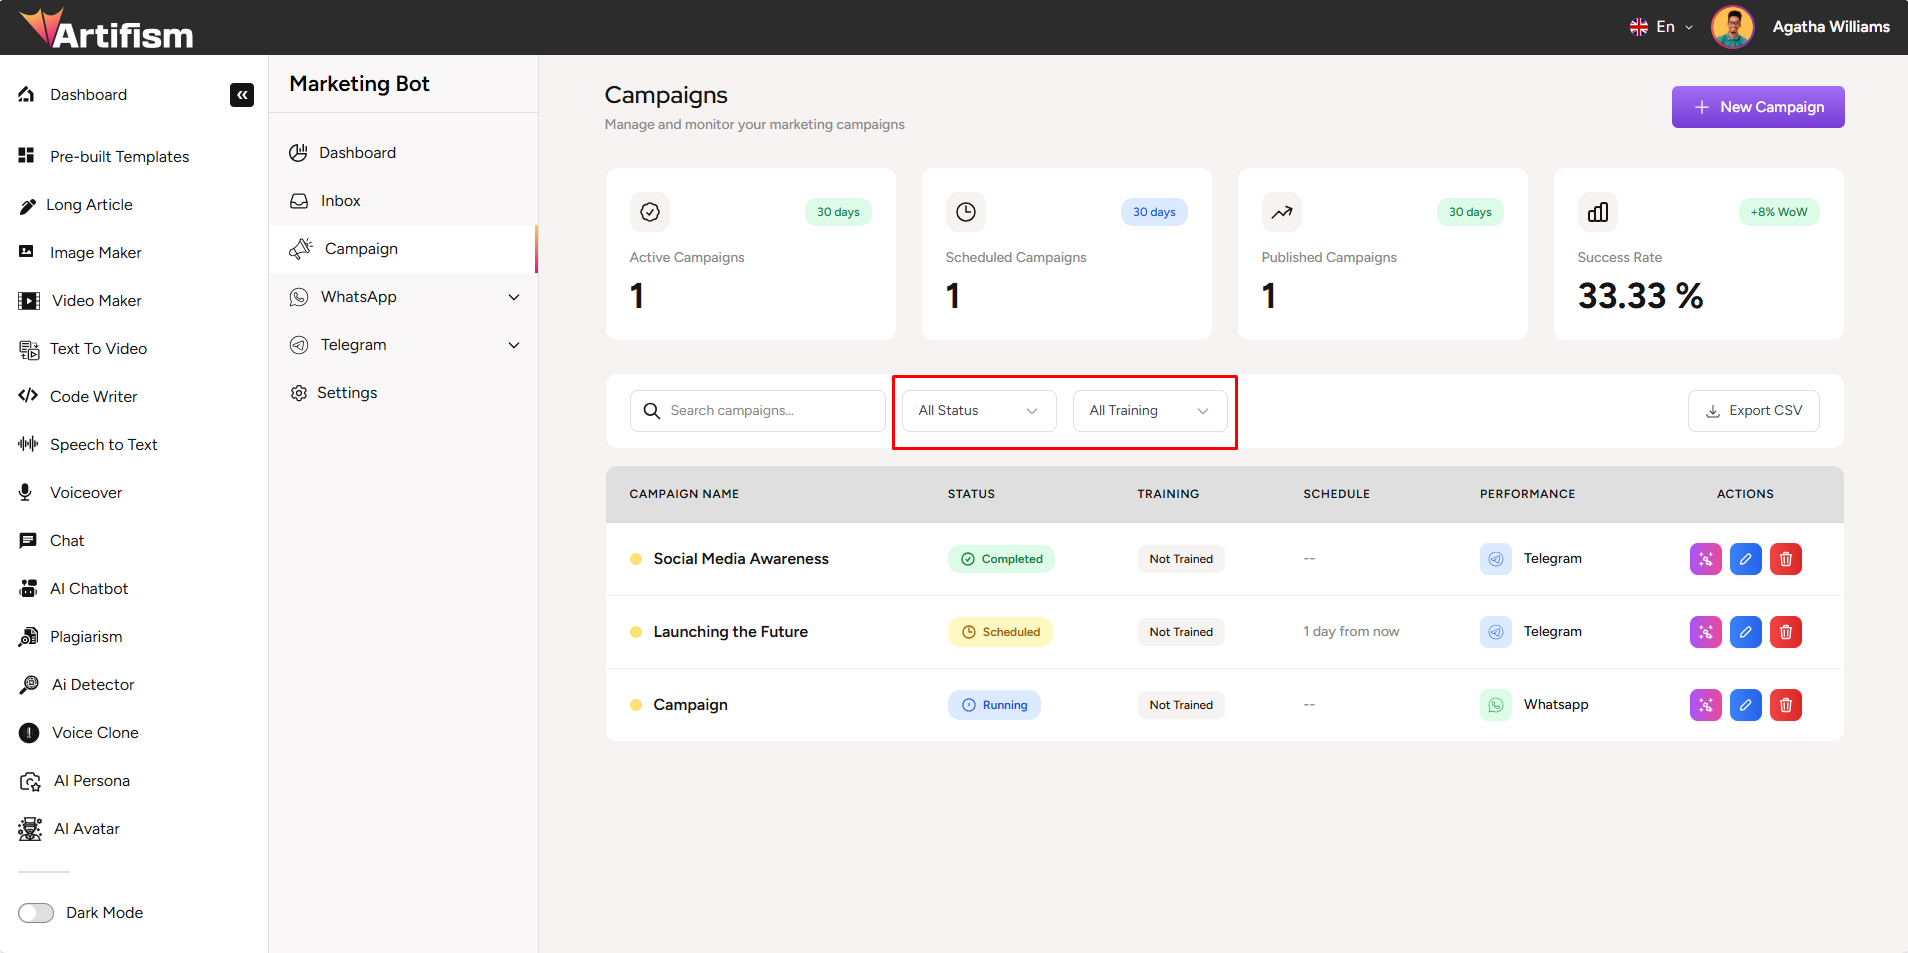
Filters and Search:
- Search campaigns by name
- Filter by status: All Status, Scheduled, Published, Active
- Filter by training: All Training, Trained, Not Trained
- Export campaigns to CSV
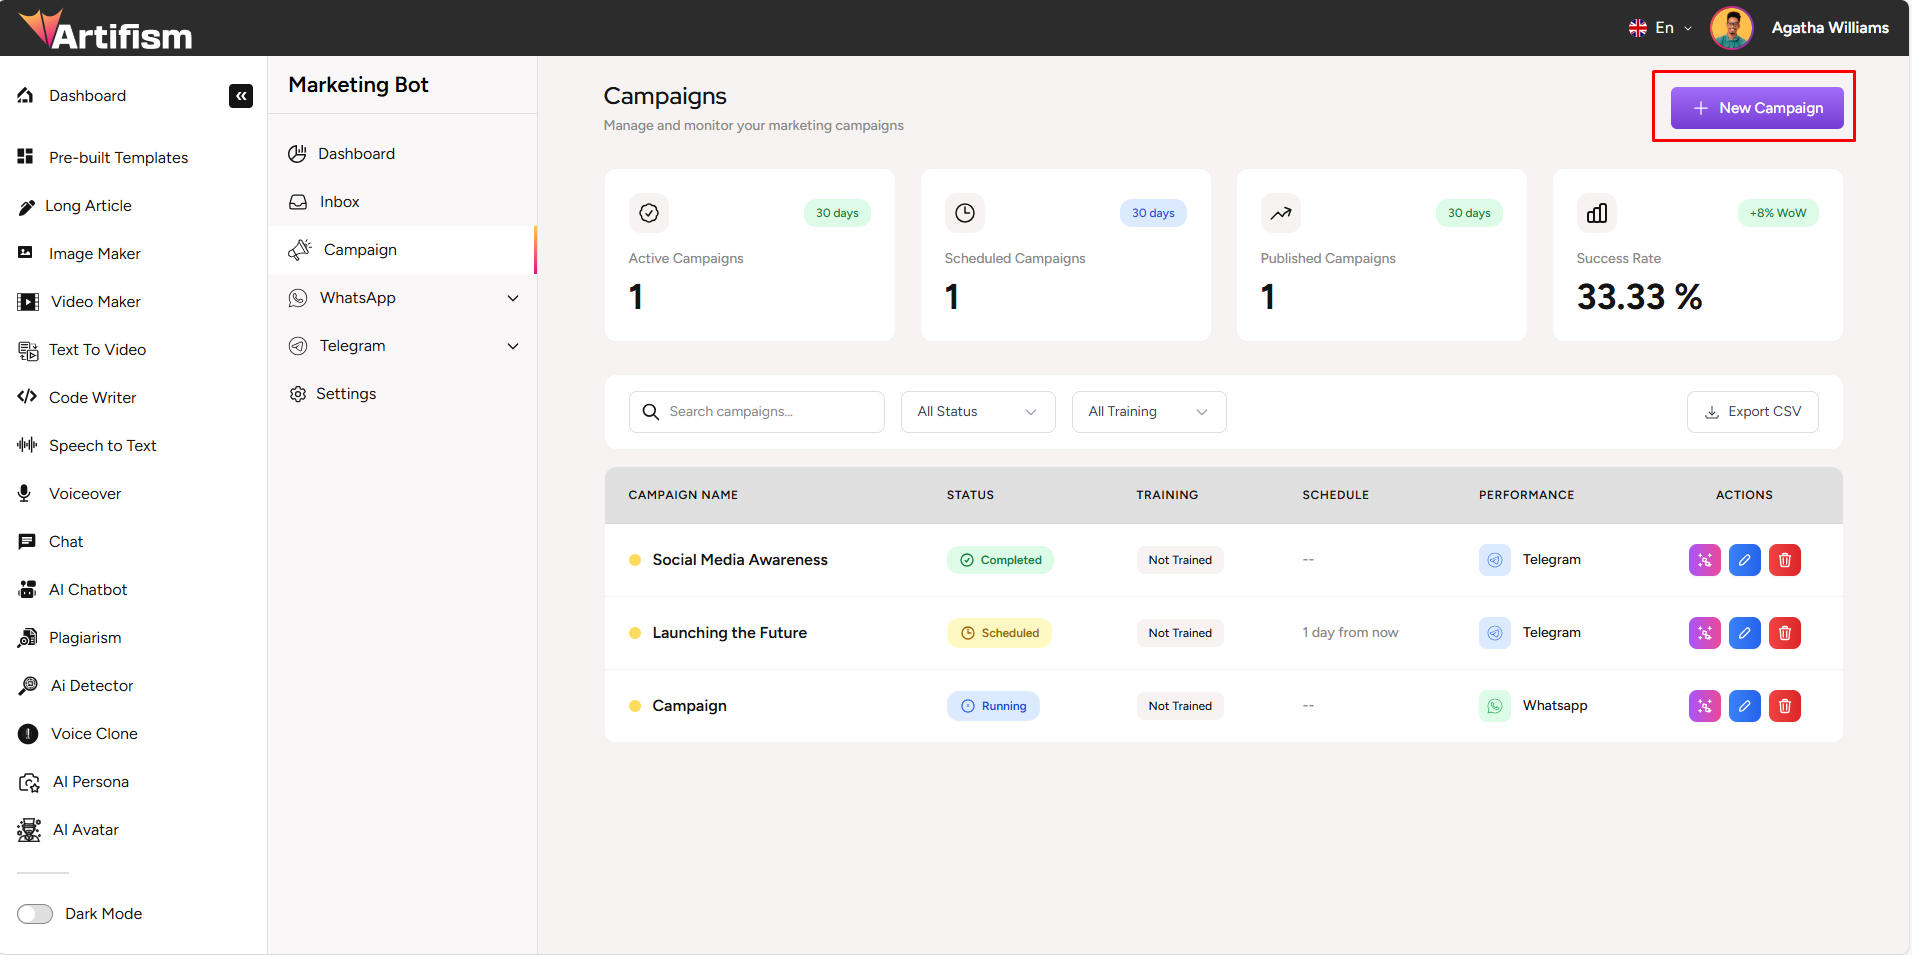
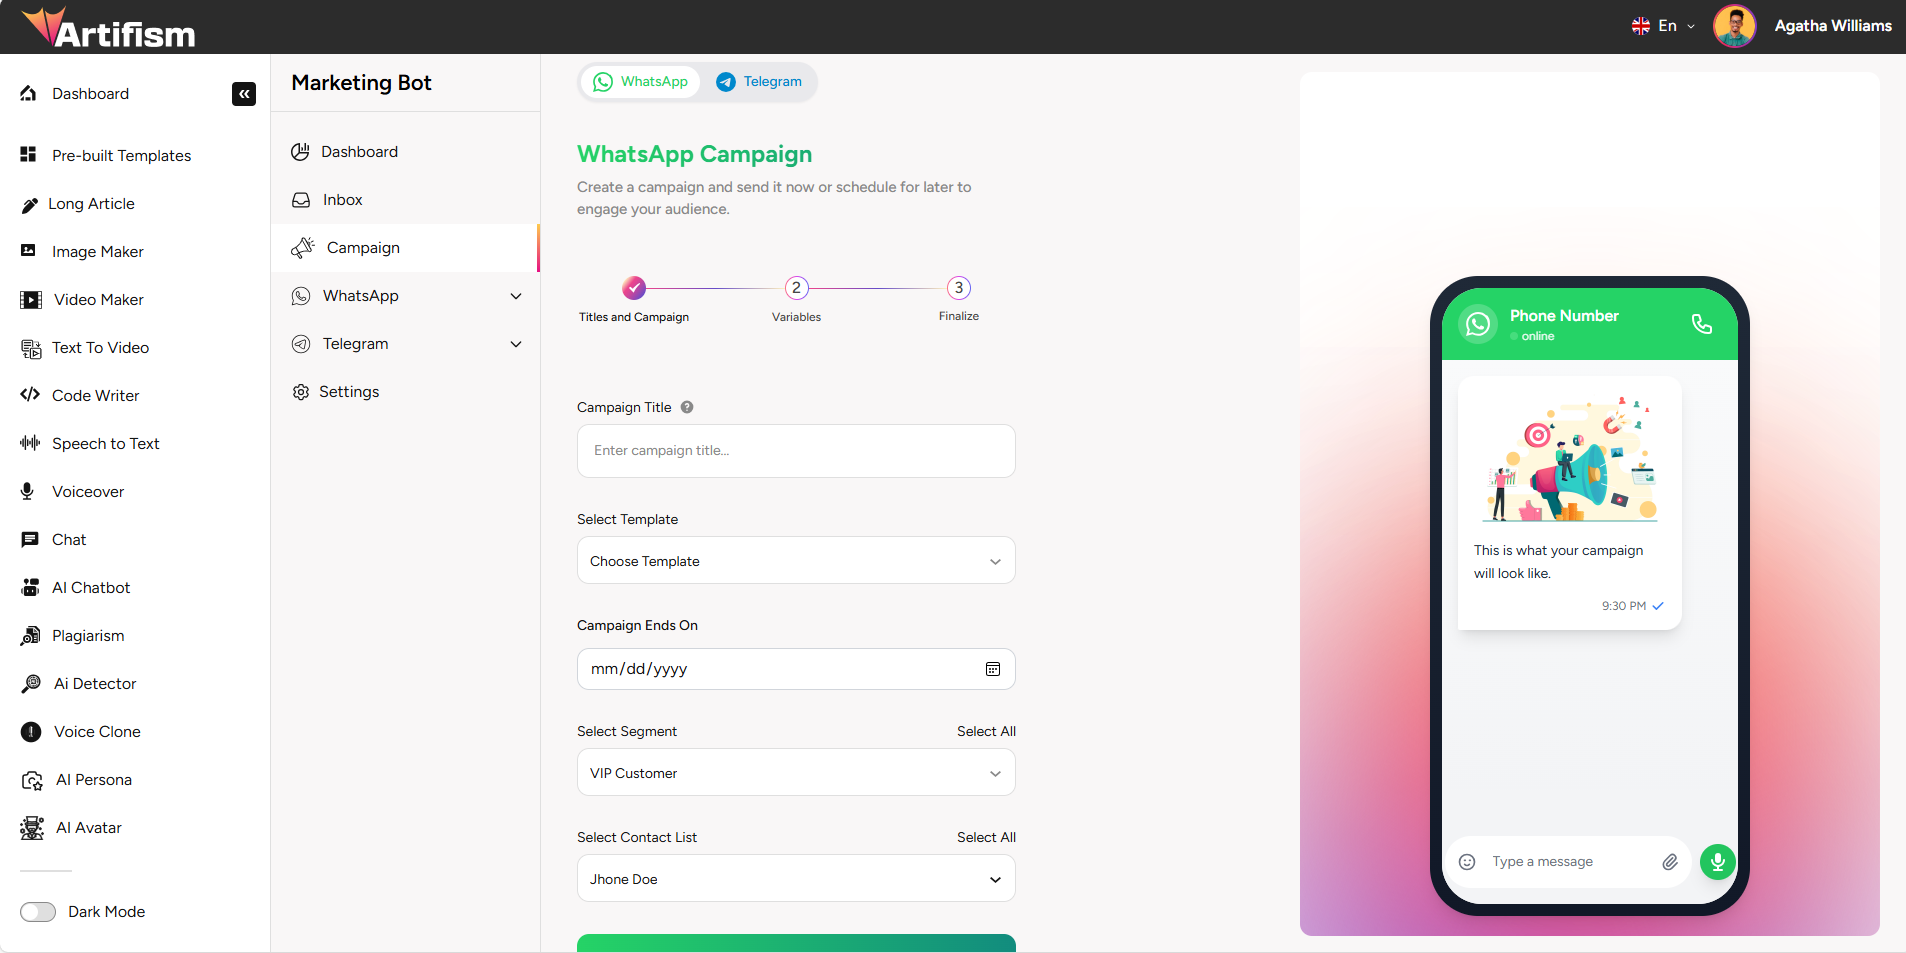
Create a WhatsApp Campaign
Step 1: Start Campaign Creation
- Click "New Campaign" button (top right)
- Select "WhatsApp Campaign" option
Step 2: Campaign Details
- Enter a campaign title
- Select a WhatsApp template from the dropdown
- Fill in template variables (if required)
- Preview your message
Step 3: Select Audience
- Choose to send to:
- Segments - Select one or more contact segments
- Individual Contacts - Select specific contacts
- Review the selected audience count
Step 4: Schedule Campaign
- Choose delivery option:
- Send Now - Campaign starts immediately
- Schedule Later - Set date and time for future delivery
- If scheduling, select date and time
Step 5: AI Reply (Optional)
- Toggle "Enable AI Reply" if you want automated responses
- Select chat provider and model
- Select embedding provider and model
- Add training materials (optional) - URLs or files to train the AI
Step 6: Review and Create
- Review all campaign details
- Check the preview
- Click "Create Campaign" button
- Wait for confirmation message
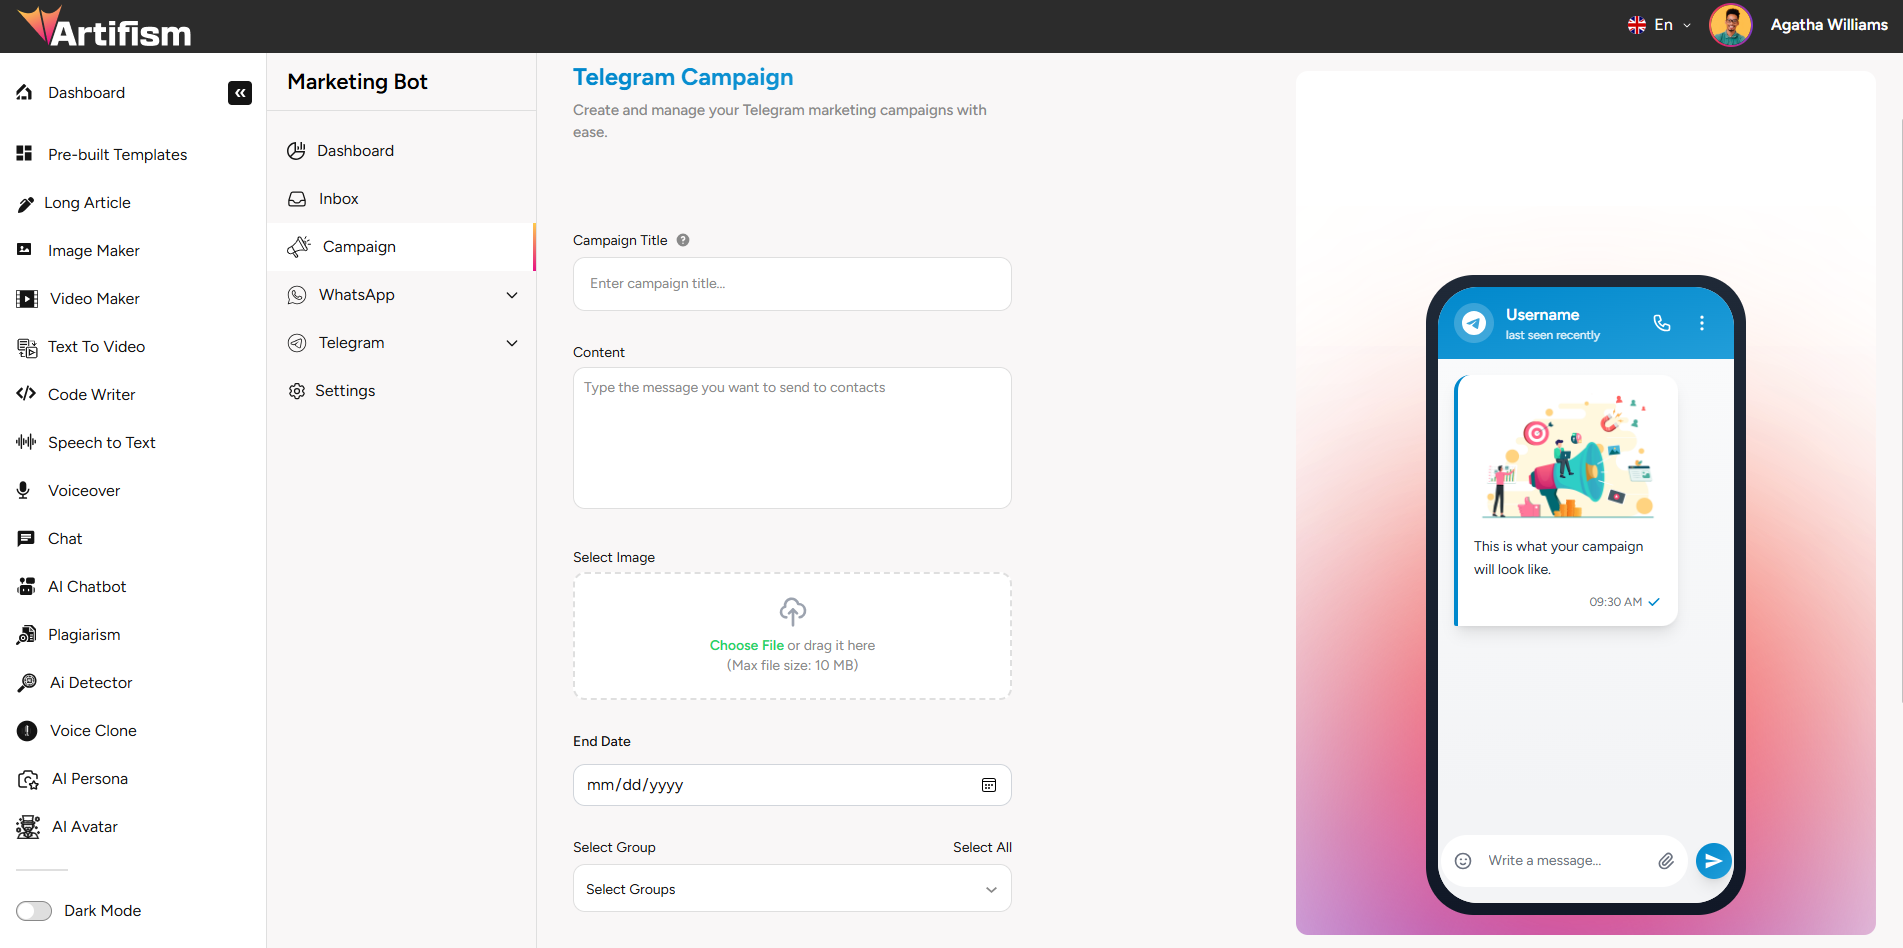
Create a Telegram Campaign
The process is similar to WhatsApp campaigns:
- Click "New Campaign" button
- Select "Telegram Campaign" option
- Enter campaign details (message content)
- Select audience:
- Subscribers - Individual bot subscribers
- Groups - Telegram groups your bot is added to
- Schedule the campaign
- Configure AI Reply (optional)
- Review and create
Manage Campaigns
View Campaigns:
- All campaigns are listed in the campaigns table
- Use search or filters to find specific campaigns
Edit Campaign:
- Find the campaign in the table
- Click Edit button (pencil icon)
- Modify campaign details
- Click "Save" button
Delete Campaign:
- Find the campaign in the table
- Click Delete button (trash icon)
- Confirm deletion in the popup
- Campaign will be removed
Export Campaigns:
- Click "Export CSV" button to download campaign data
Inbox
Manage and respond to conversations with your contacts.
Conversation List (Left Sidebar)
- Search Bar - Find specific conversations by phone number or name
- Channel Filter - Filter by: All Channels, WhatsApp, or Telegram
- Conversation Items - Show contact phone number, channel icon, and last message timestamp
Chat Area
Chat Header:
- Contact avatar/profile image
- Contact phone number
- Chat details button (three dots icon)
Message Thread:
- Marketing messages sent by AI Agent (highlighted in orange/red gradient)
- Customer responses (white/gray background)
- Timestamps for each message
Message Input:
- Text input field
- Attachment button (paperclip icon)
- Send button (arrow icon)
Chat Details
Click the three dots icon or contact avatar to open chat details drawer:
Contact Information:
- Name
- Phone Number
- Country
- IP Address
Chat Information:
- Created Date
- Status
- Last Activity
- Language
Actions:
- Mark as Closed button
How to Use Inbox
- Navigate to Inbox from the sidebar
- Use search bar or channel filter to find conversations
- Click on a conversation to open it
- View message history in the chat area
- Type your message in the input field
- Click send button (arrow icon) to send
- Click chat details button to view contact information
- Mark conversations as closed when resolved
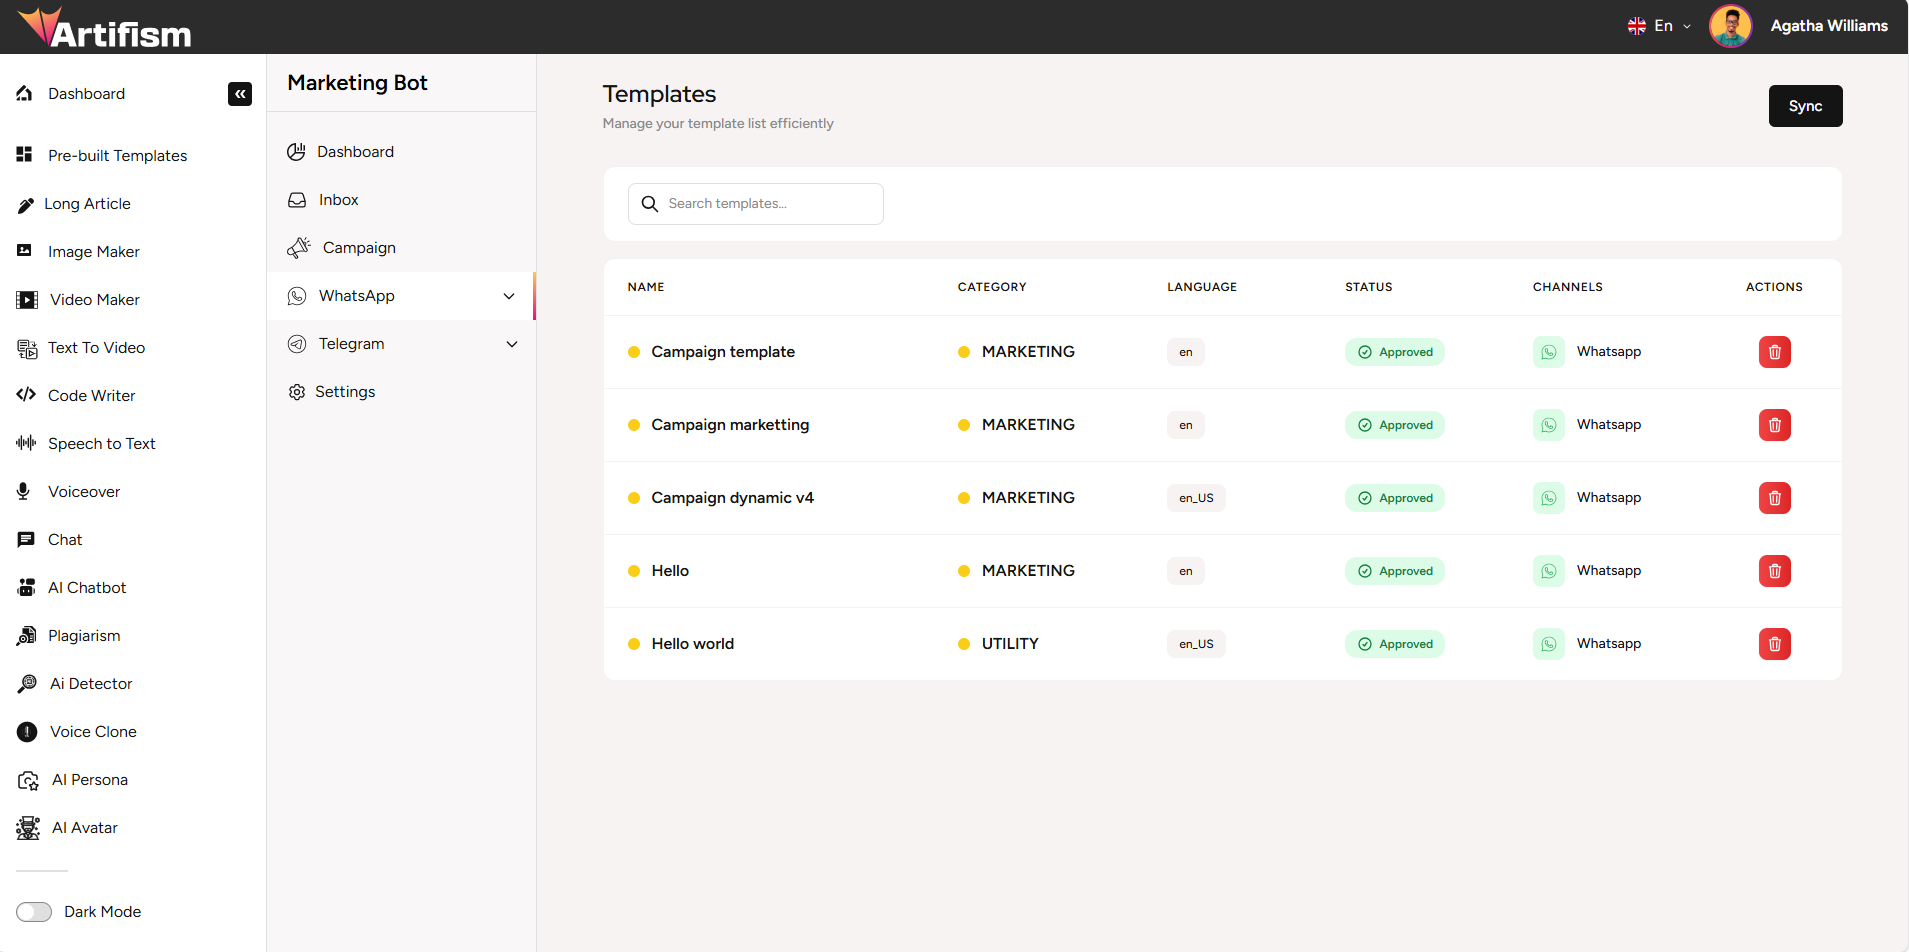
WhatsApp Management
Templates
Manage WhatsApp message templates approved by WhatsApp Business API.
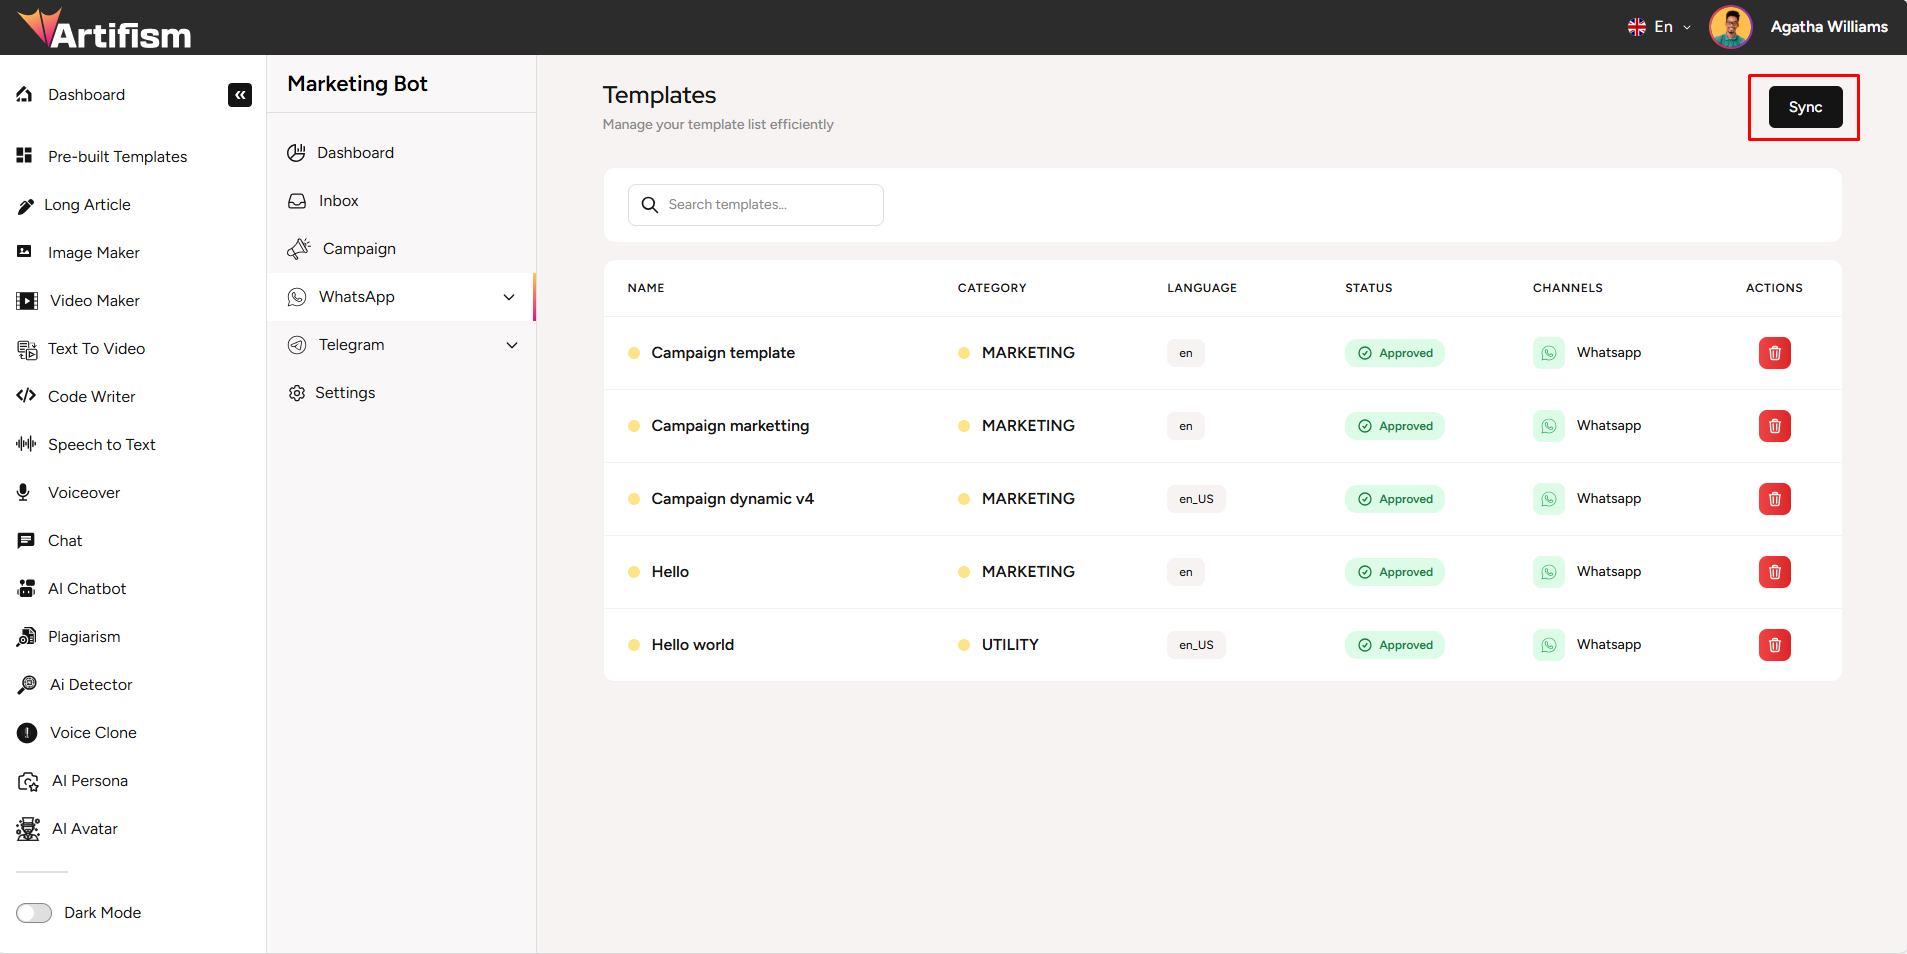
Sync Templates:
- Navigate to WhatsApp > Templates from the sidebar
- Click "Sync" button
- Wait for sync to complete (loading indicator will show)
- Templates will appear in the table
Template Table Shows:
- Template name
- Status
- Category
- Language
- Created date
- Actions (Delete button)
Search Templates:
- Use the search bar to find specific templates by name
Delete Template:
- Click Delete button to remove template from your list
- Note: This only removes it from your list, not from WhatsApp
Important: Templates must be approved by WhatsApp before they can be used in campaigns.
Contacts
Manage your WhatsApp contact list.
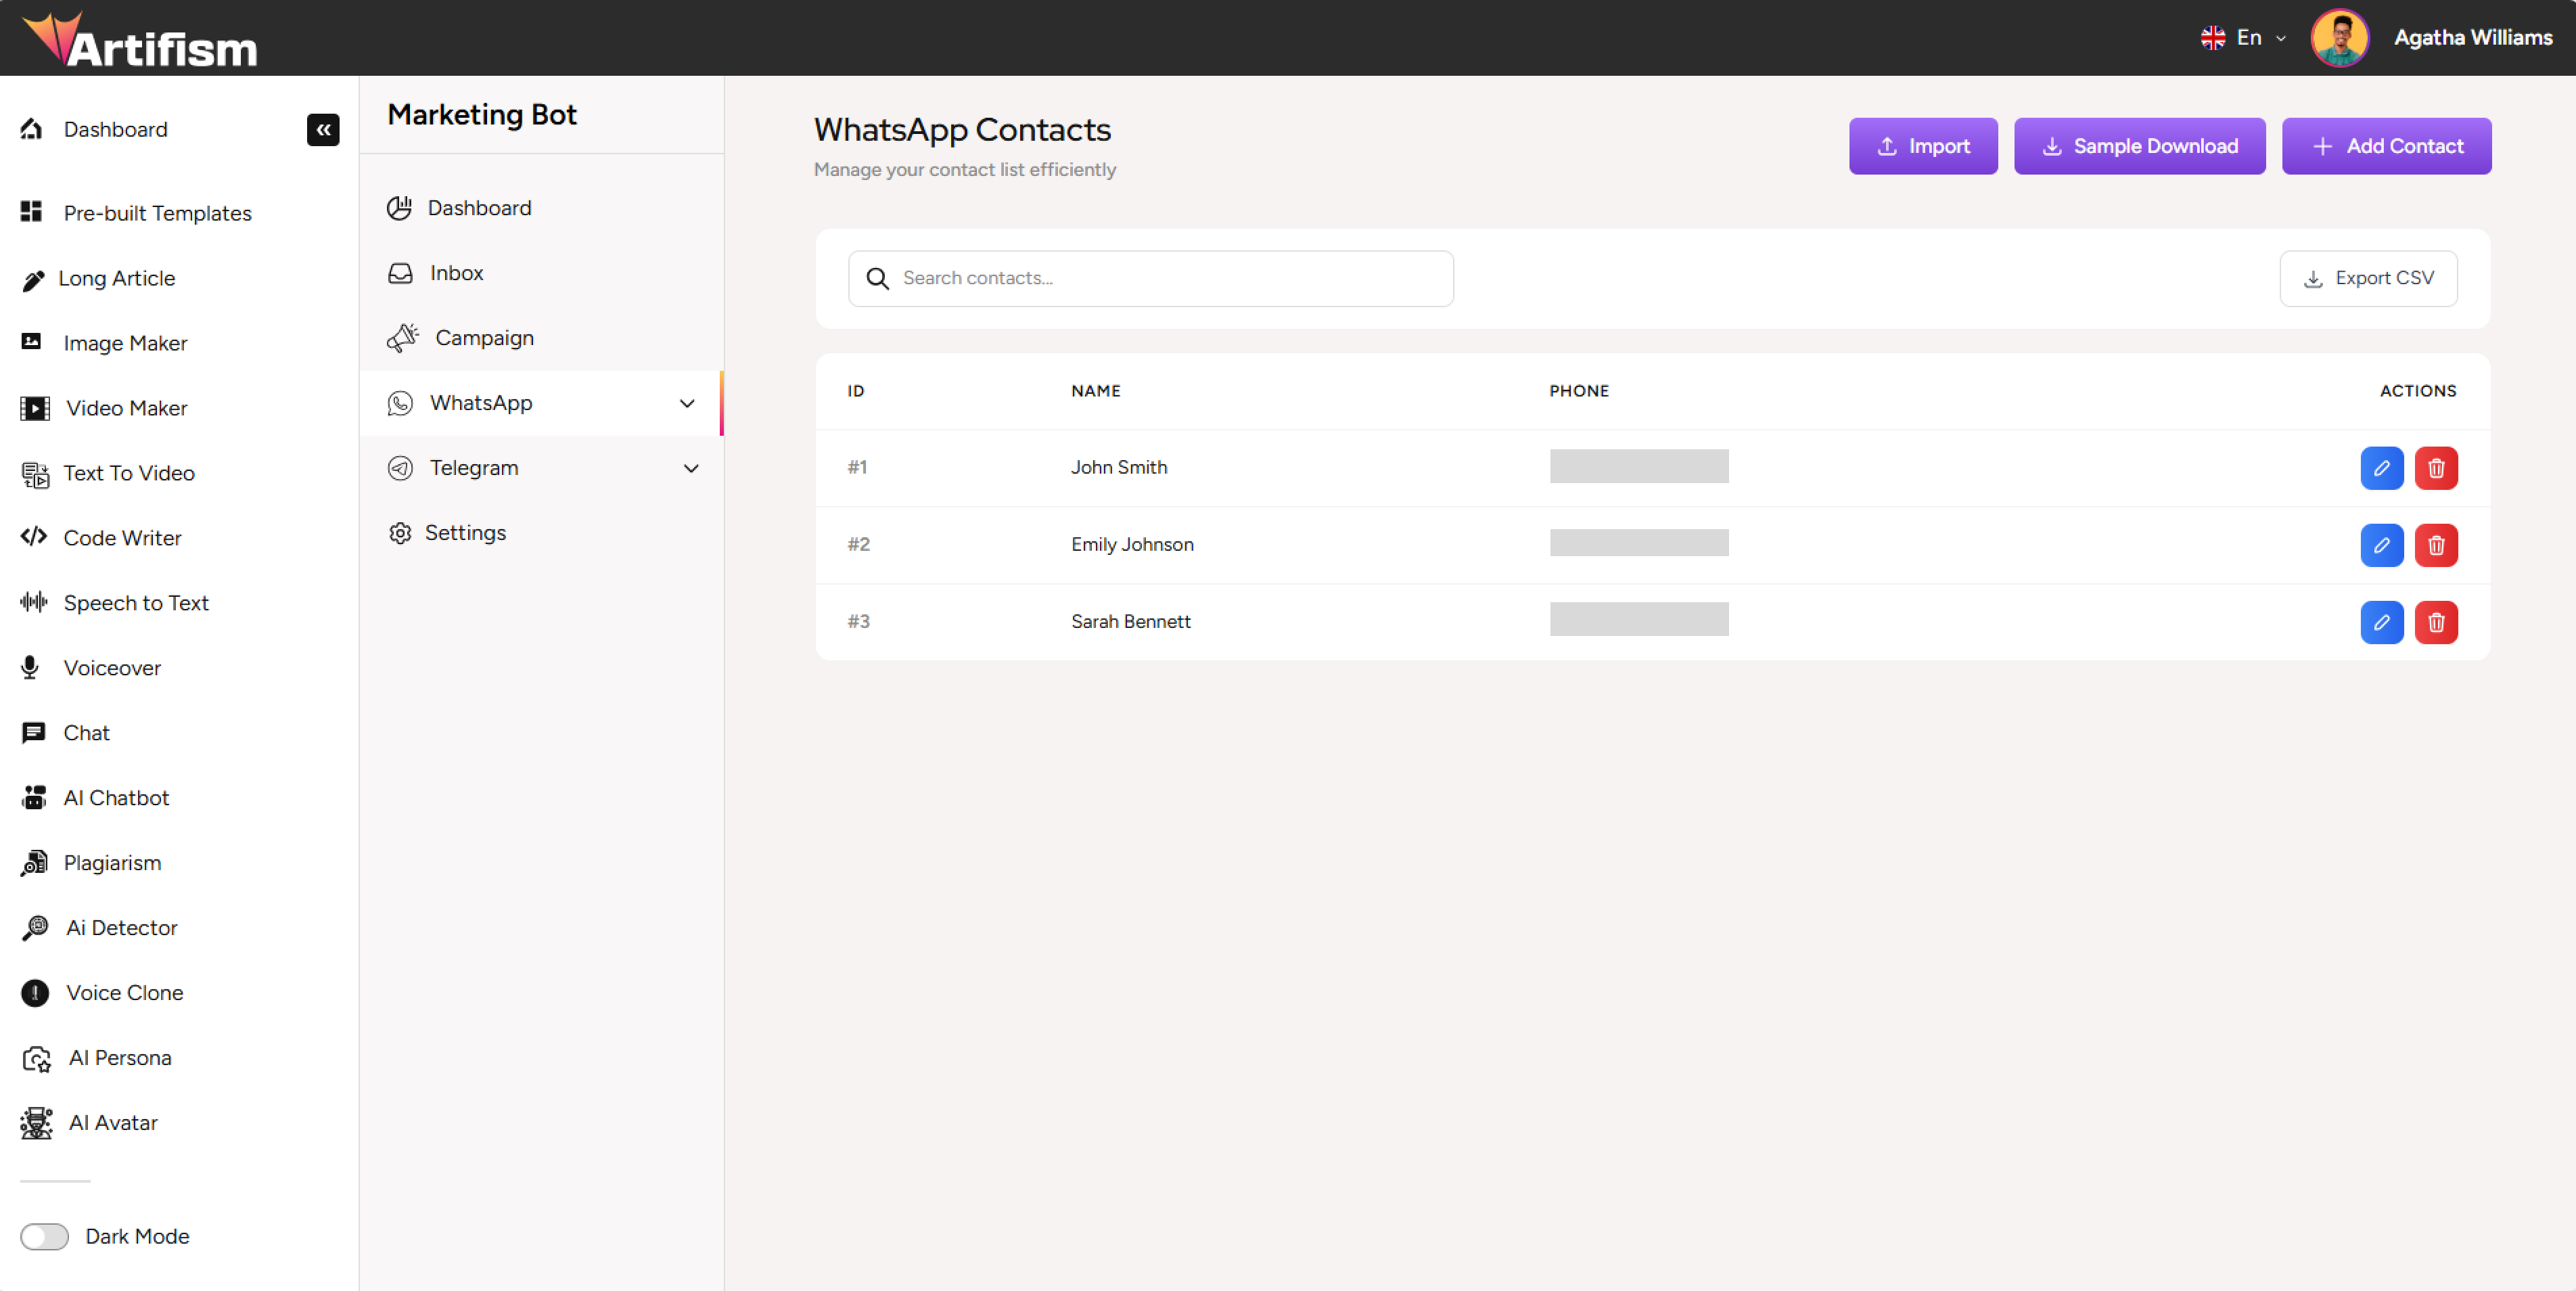
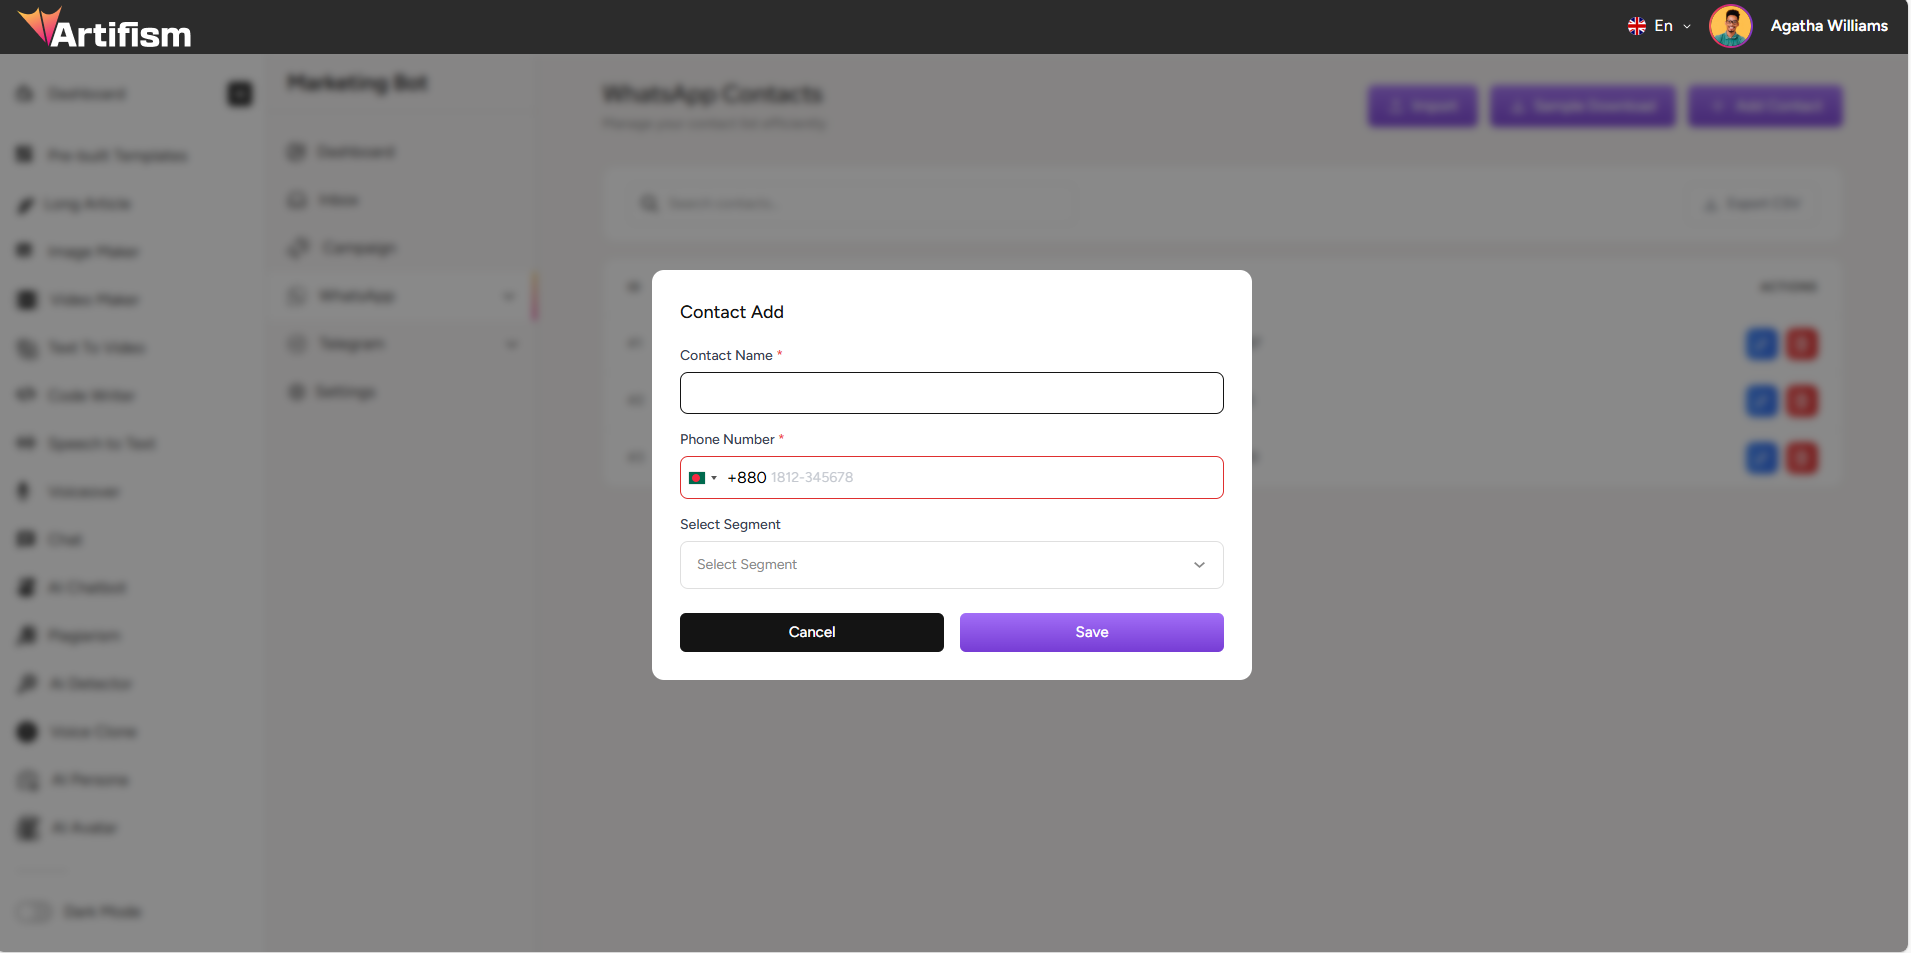
Add a Contact
- Click "Add Contact" button
- Fill in the form:
- Contact Name (required)
- Phone Number (required) - Select country code from dropdown
- Select Segment (optional) - Choose one or more segments
- Click "Save" button
Import Contacts
- Click "Import" button
- Select a CSV file from your computer
- File preview will appear
- Click "Import" button to upload
- Wait for import to complete
CSV Format Required:
Name, Phone Number, Segment (optional)
John Doe, +1234567890, Premium Customers
Jane Smith, +0987654321,
Important: Phone numbers must include country code (e.g., +1234567890).

Edit or Delete Contacts
- Find the contact in the contacts table
- Click Edit button (pencil icon) to modify
- Click Delete button (trash icon) to remove
- Confirm deletion in popup
Export Contacts:
- Click "Export CSV" button to download all contacts
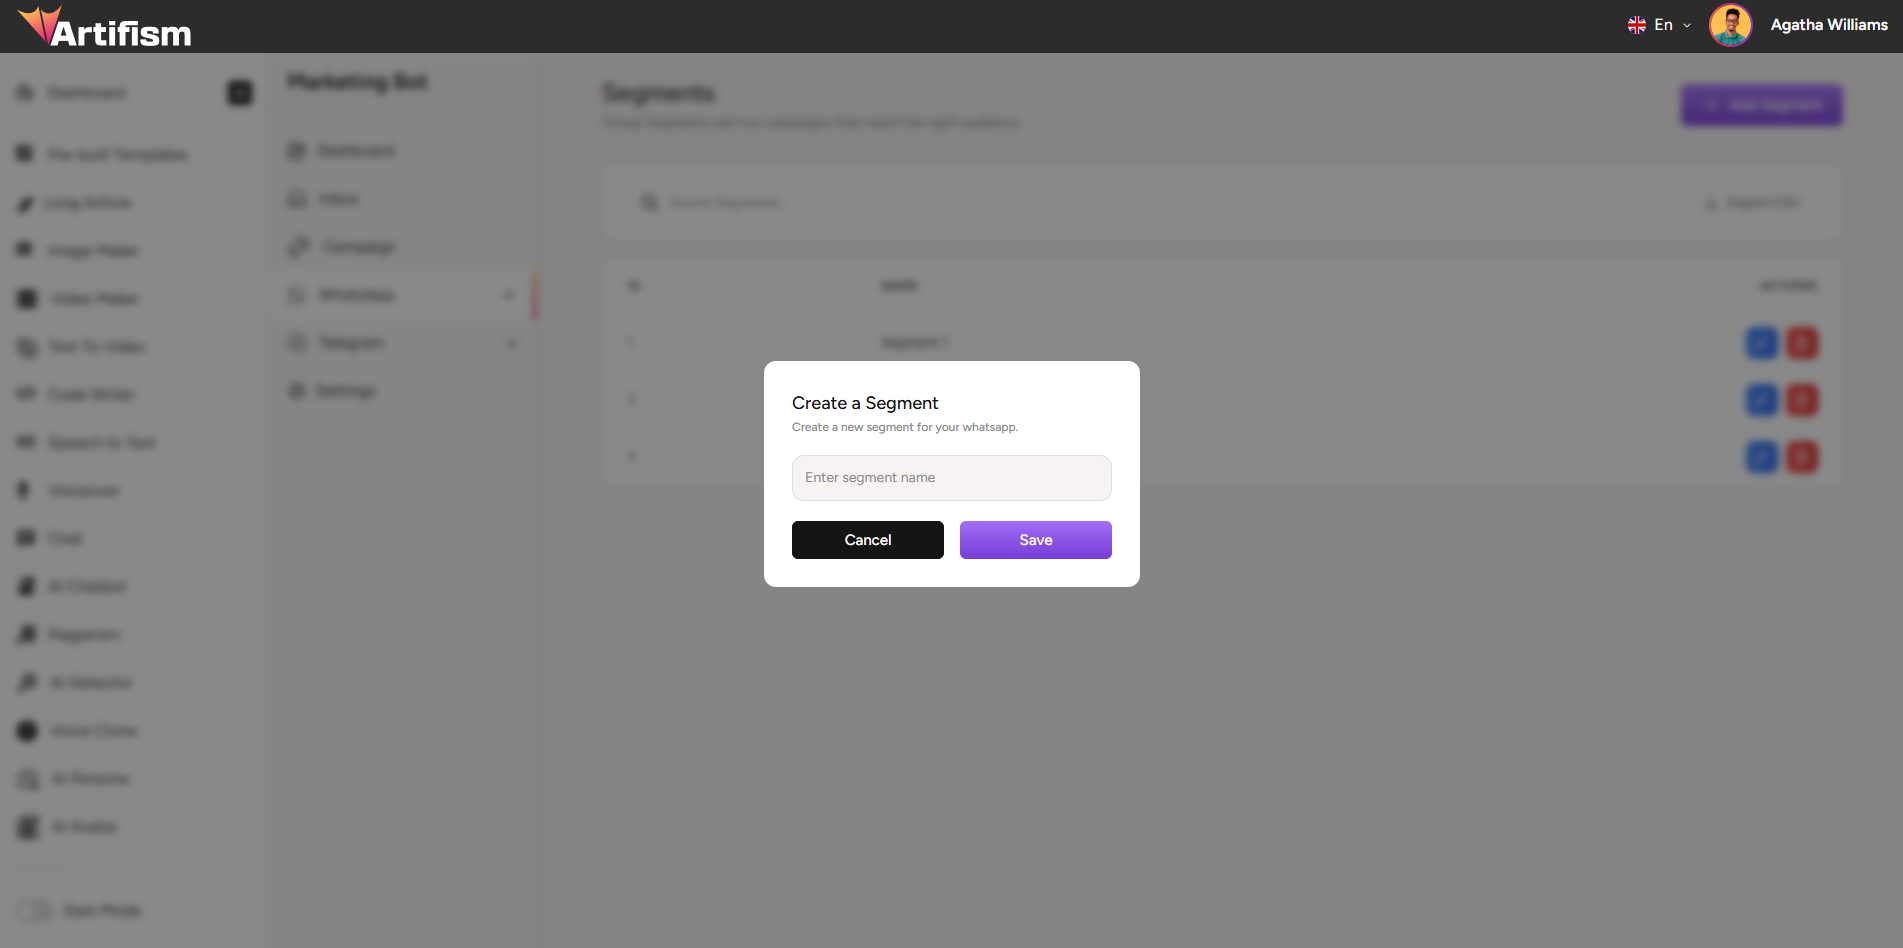
Segments
Group contacts into segments for targeted marketing campaigns.

Create a Segment
- Click "Add Segment" button
- Enter segment name in the modal
- Click "Save" button
- Assign contacts to the segment from the Contacts page
Edit or Delete Segments
- Find the segment in the segments table
- Click Edit button (pencil icon) to modify name
- Click Delete button (trash icon) to remove
- Confirm deletion in popup
Note: Deleting a segment does NOT delete the contacts assigned to it. Contacts will remain but won't be in that segment anymore.
Export Segments:
- Click "Export CSV" button to download segment data
Telegram Management
Subscribers
View and manage Telegram bot subscribers.
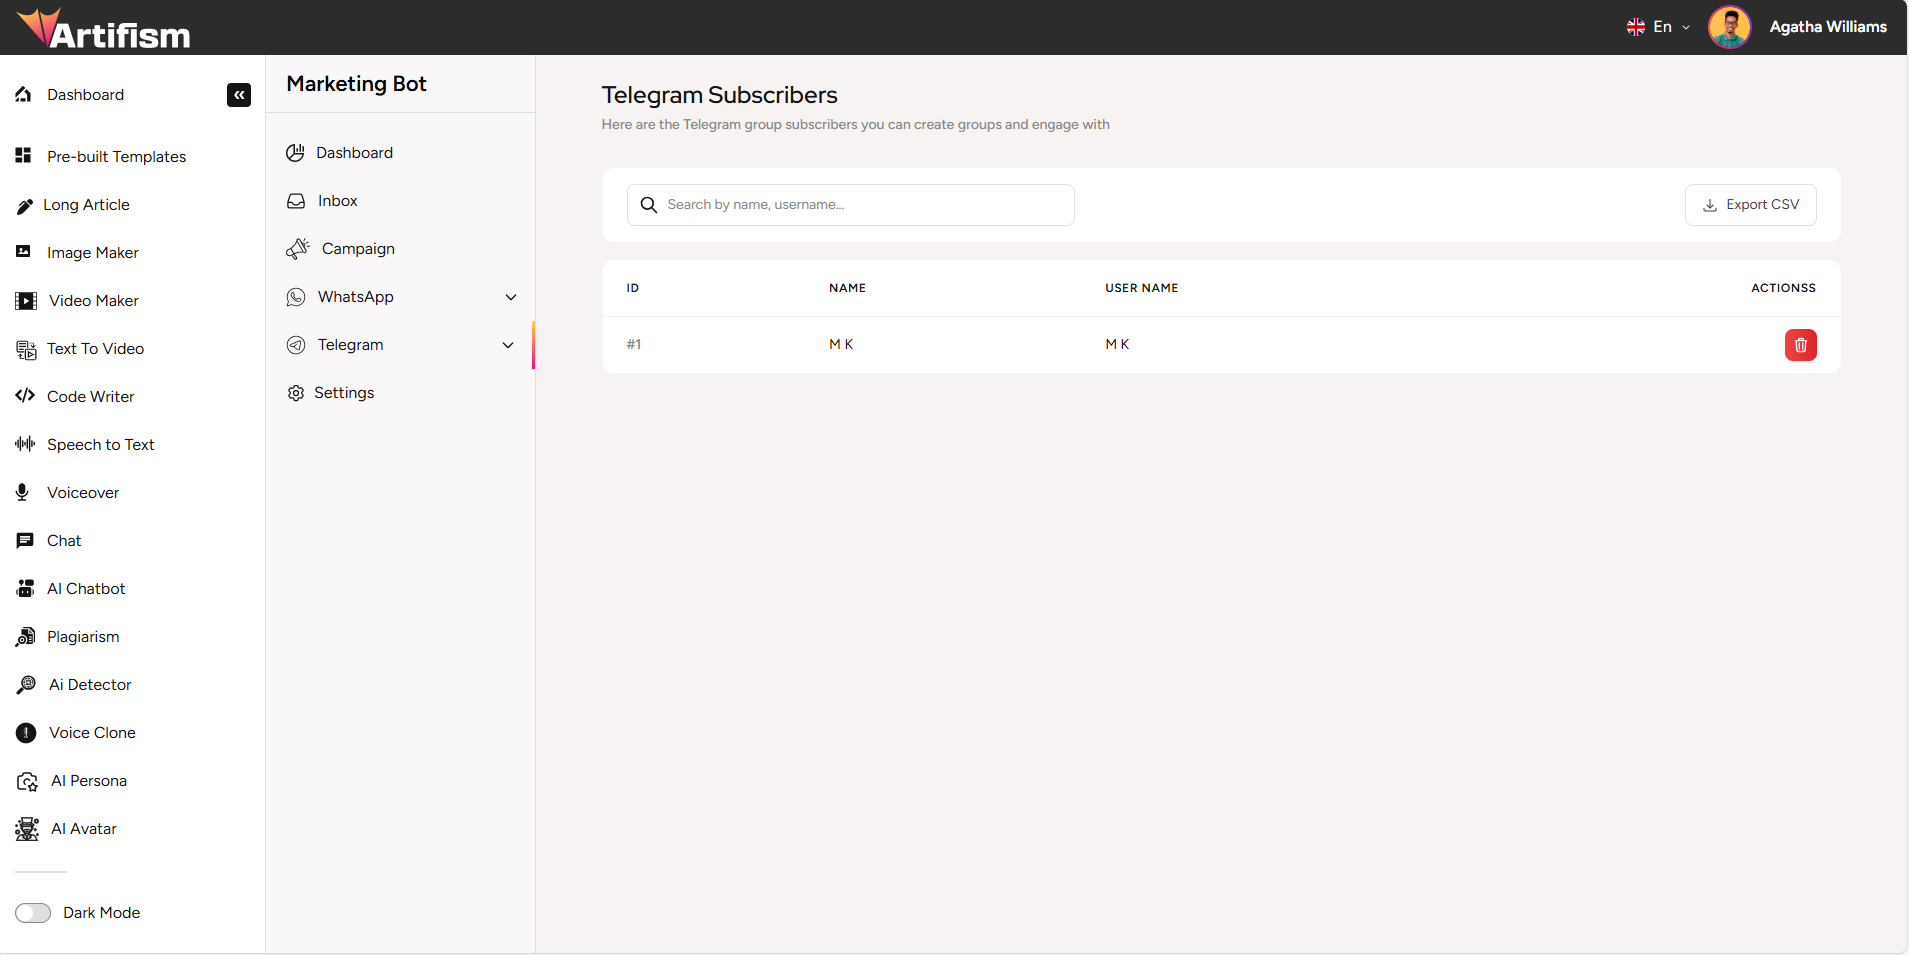
Subscriber Information:
- Subscriber ID
- Username
- Chat ID
- Joined date
- Actions (Delete button)
How to Use:
- Navigate to Telegram > Subscribers from the sidebar
- View all subscribers in the table
- Use search bar to find specific subscribers
- Click Delete button to remove subscribers
- Click "Export CSV" to download subscriber data
Note: Subscribers are added automatically when they start a conversation with your Telegram bot.
Groups
Manage Telegram groups for group messaging campaigns.

Group Information:
- Group ID
- Group Name
- Member count
- Created date
- Actions (Delete button)
How to Use:
- Navigate to Telegram > Groups from the sidebar
- View all groups in the table
- Use search bar to find specific groups
- Click Delete button to remove groups
- Click "Export CSV" to download group data
Important:
- Your bot must be manually added to Telegram groups before they appear here
- Make sure your bot has permission to send messages in the group
Troubleshooting
Webhook Not Connecting
Symptoms:
Webhook status shows as disconnected (red badge)
Solutions:
- Verify API credentials are correct in Settings
- Check webhook URL is properly copied (no extra spaces)
- Ensure webhook is configured in platform settings (WhatsApp/Telegram)
- Verify your server allows incoming webhook requests
- Check firewall settings
Support
For additional help:
- Review this documentation
- Contact your support team
- Check platform-specific documentation:
- WhatsApp Business API Documentation
- Telegram Bot API Documentation