General Settings
Go to Configuration ⇒ General Settings from the sidebar. Then five settings will be there to configure, System Setup, Preference, Maintenance Mode, Language and Redirect Link.
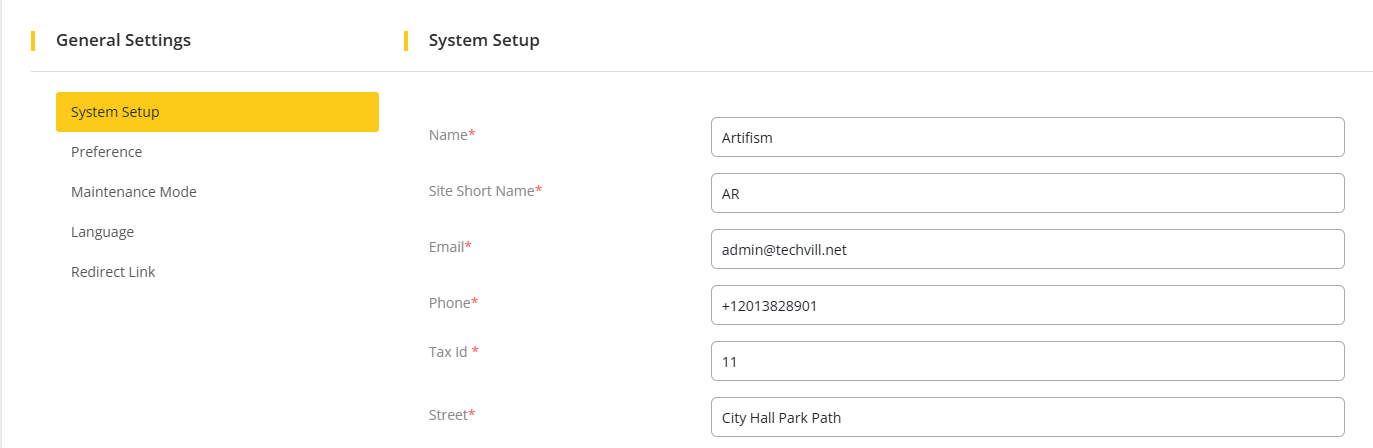
System Setup
Go to System Setup, a form will appear which will help to set up the company details easily.
Fill-up the form with valid information and submit the form, it will save the information. This information is related to the company. It can be edited whenever an admin needs to change the company information. This information will be visible in the invoice for subscription.
Preference
Go to Preferences, then fill up the form according to your preference. Any change in this form will be applied on the whole system. Click on Save to save the changes
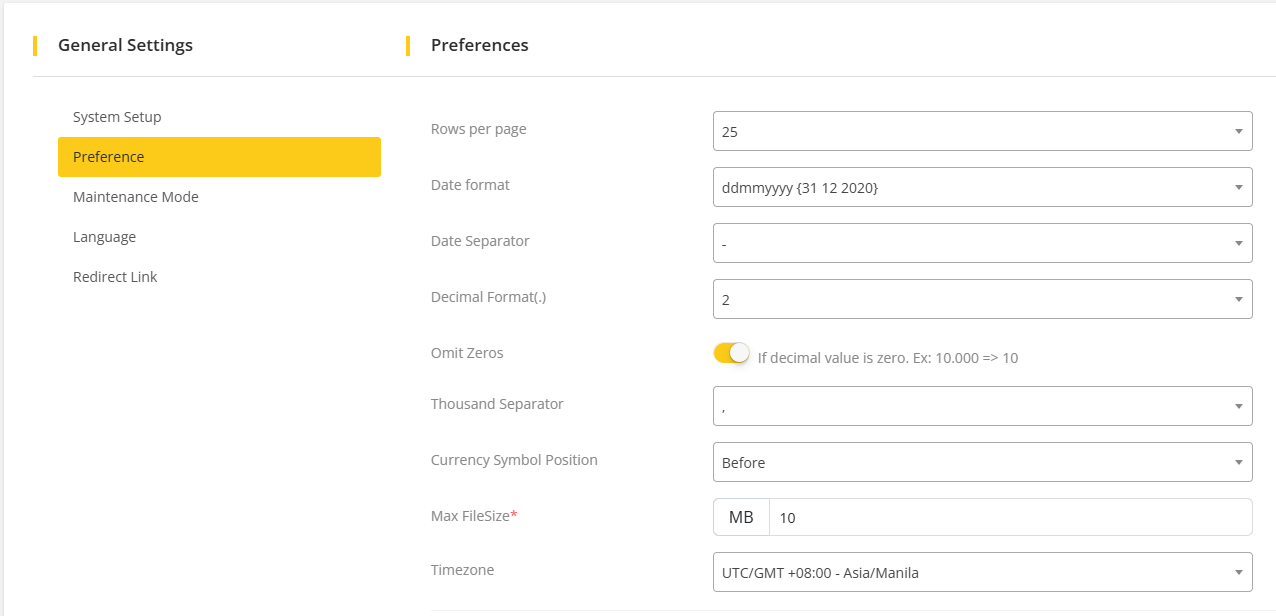
- Select a value from the dropdown in rows per page to see that amount of rows of data in other modules.
- Date format indicates the date format for the whole system and Date Separator used as date separator symbol of that date format.
- Date separator is used to declare how date should be displayed on the system and how day, month and year will be separated.
- Decimal Format used to see how many numbers will be visible after the decimal point(.).
- When Omit Zero is enabled, then the zero after decimal will be omitted.
- The Thousand Separator used to separate any amount in the system.
- Currency Symbol Position identifies the currency symbol will be shown before or after the amount.
- Max File Size indicates the maximum file size that can be uploaded throughout the system.
- Timezone: set time zone according to the current time
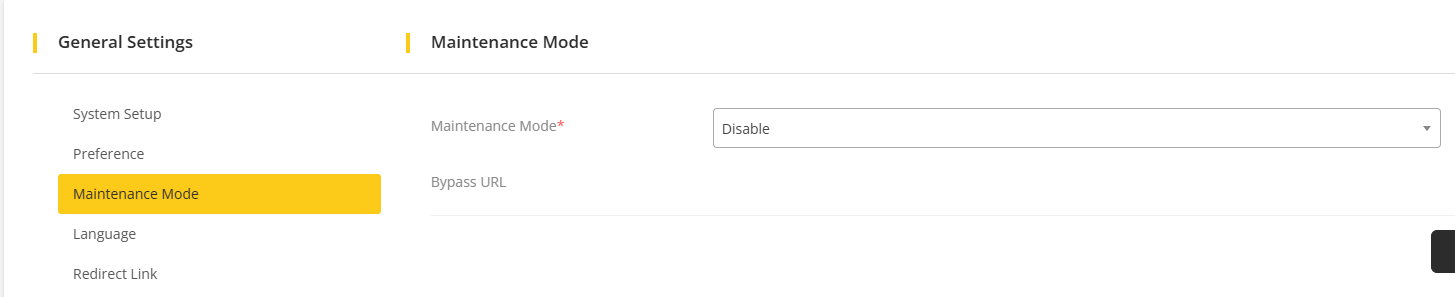
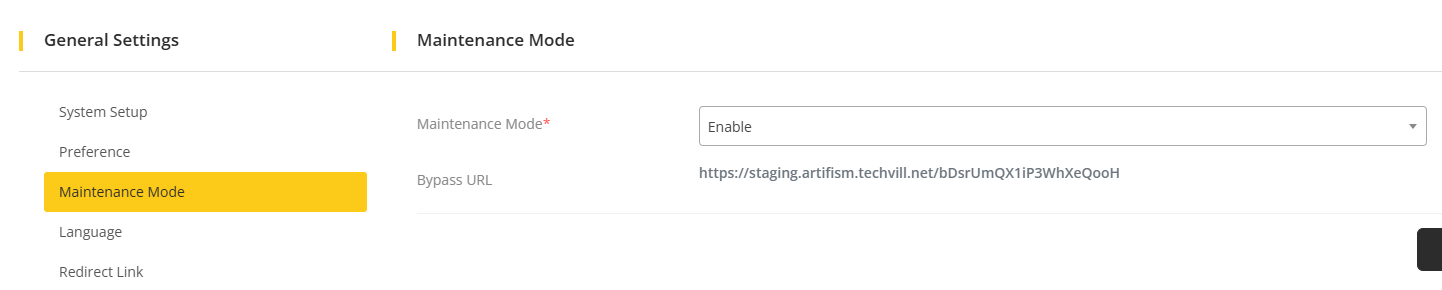
Maintenance Mode
Go to Maintenance Mode. A dropdown option will appear, and selecting Enable from that option will activate the maintenance mode. A bypass URL will be given to work on the system when the maintenance mode is enabled, and the system will be deactivated for the user. Selecting Disable from the option will deactivate the maintenance mode.
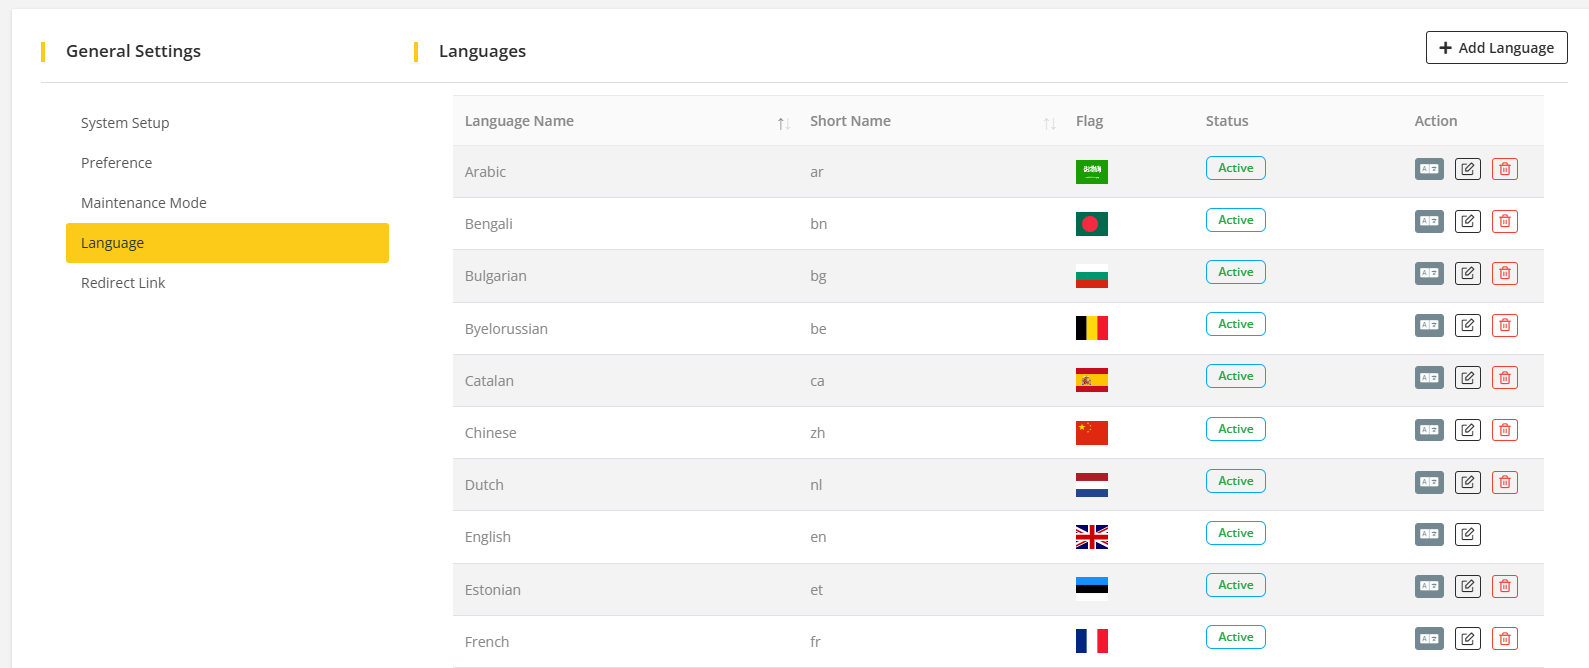
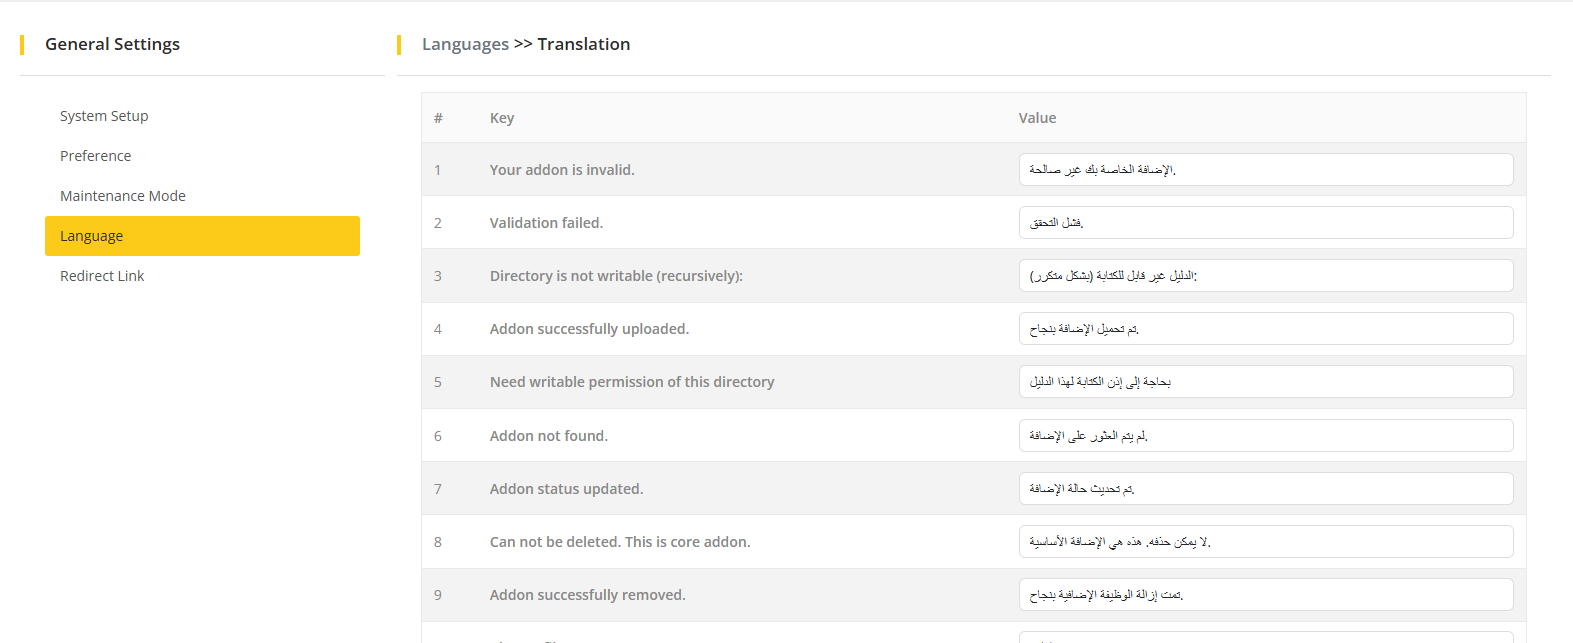
Languages
Go to Language and click on the Add Language to add a new language. A popup form will be visible.
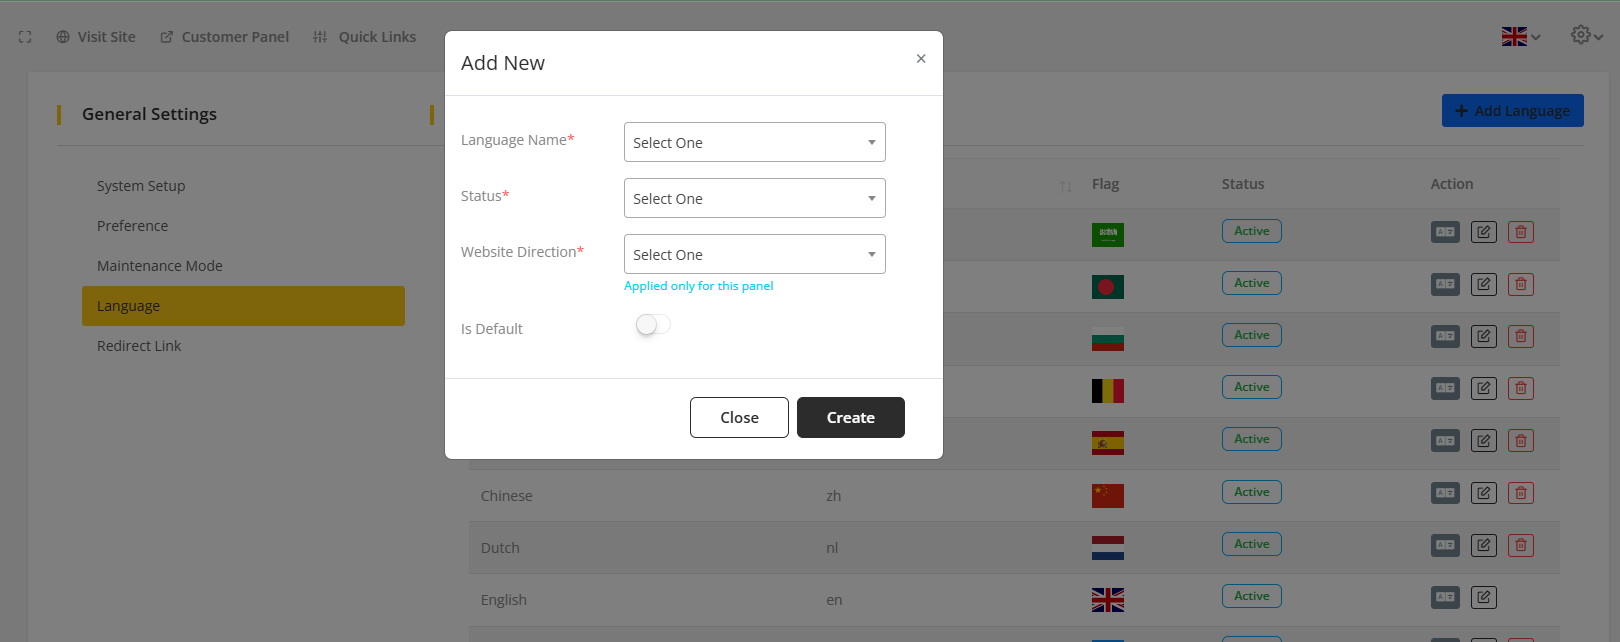
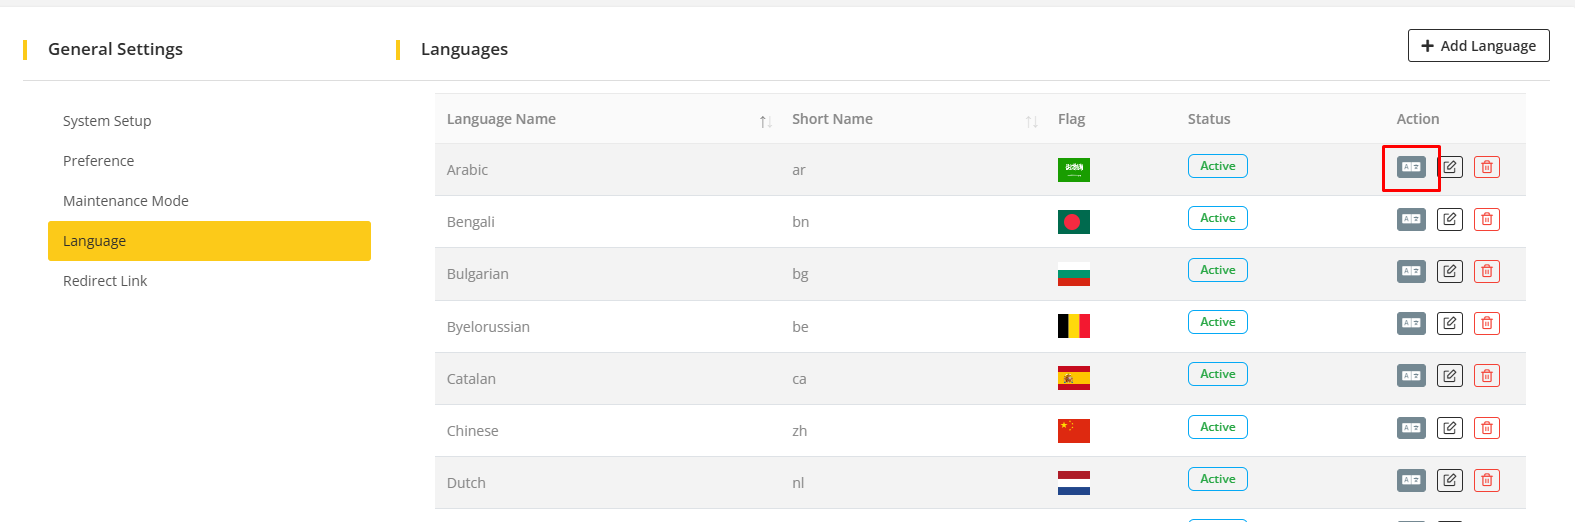
Select Language Name, Status, Website Direction and enable Is Default to use the language as default and Click Create. To edit the translation of any language, click on the Translate icon. It will redirect to the translation page.
To translate or change the translation, search for that word or sentence, then write the translated word or sentence on the field and Save the changes.
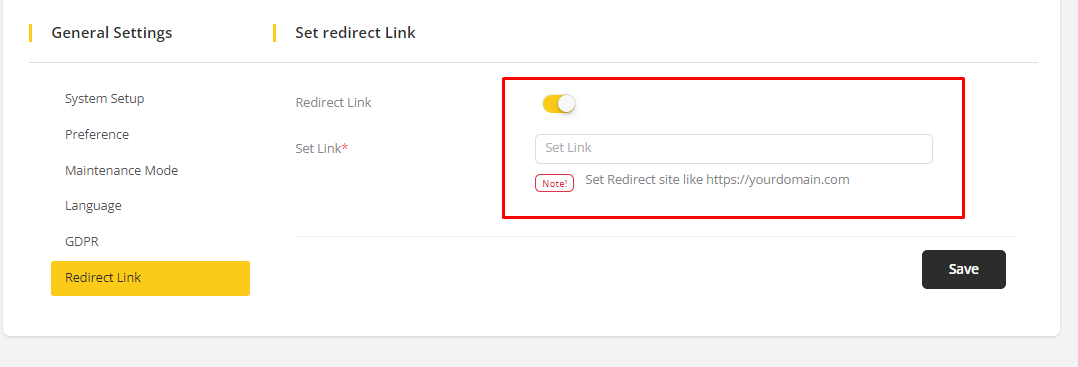
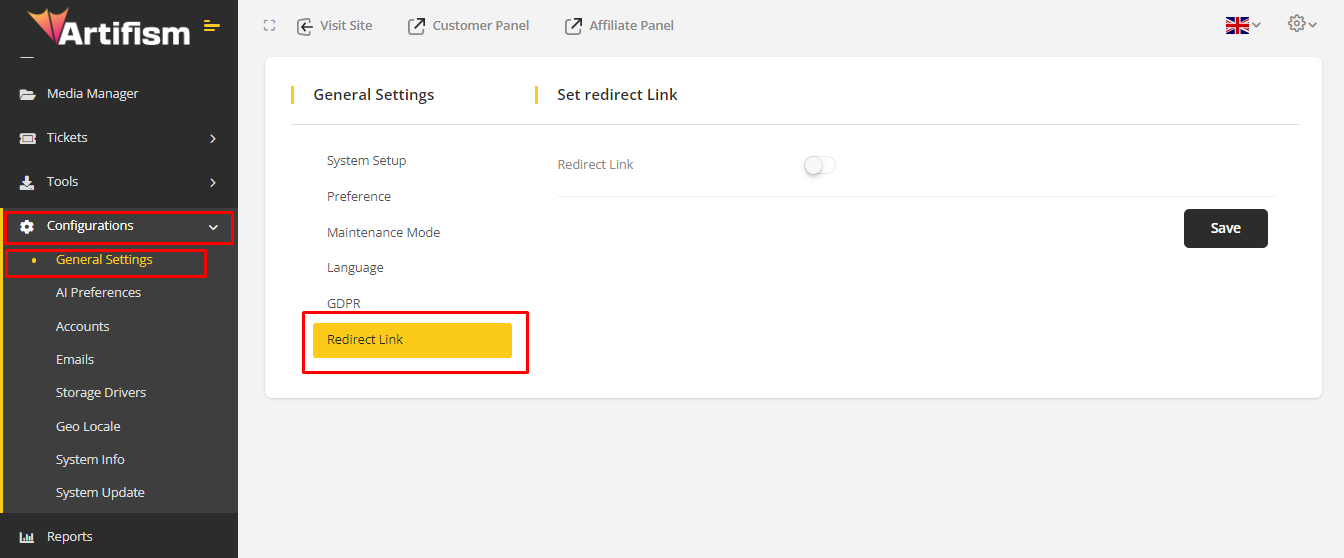
Redirect Link
Using this feature you can redirect your system’s base url to another link. For example your Artifism system is installed in artifism.com. Using this feature you can redirect your system’s base url to demo.com. For this, when someone browses your site artifism.com they will automatically redirect to demo.com. This is not related to Maintenance Mode. Here your site’s landing page or root page will redirect with another site page. But in Maintenance Mode your system will turn off.
To access this feature go to Artifism’s admin panel ⇒ Configurations ⇒ General Settings. After that, Click on the Redirect Link tab to get to the redirect link page.
Here initially the Redirect Link is switched off. You can disable/enable this feature by clicking on this switch button.
Note
- There is no connection between your current site and redirected site. If you need to make any connection between you need to do it manually by yourself.
For the initial setup you need to switch on the Redirect Link. After that, you will see an input field named Set Link. Here you need to set your redirected link. After setting up click on Save button save your changes.