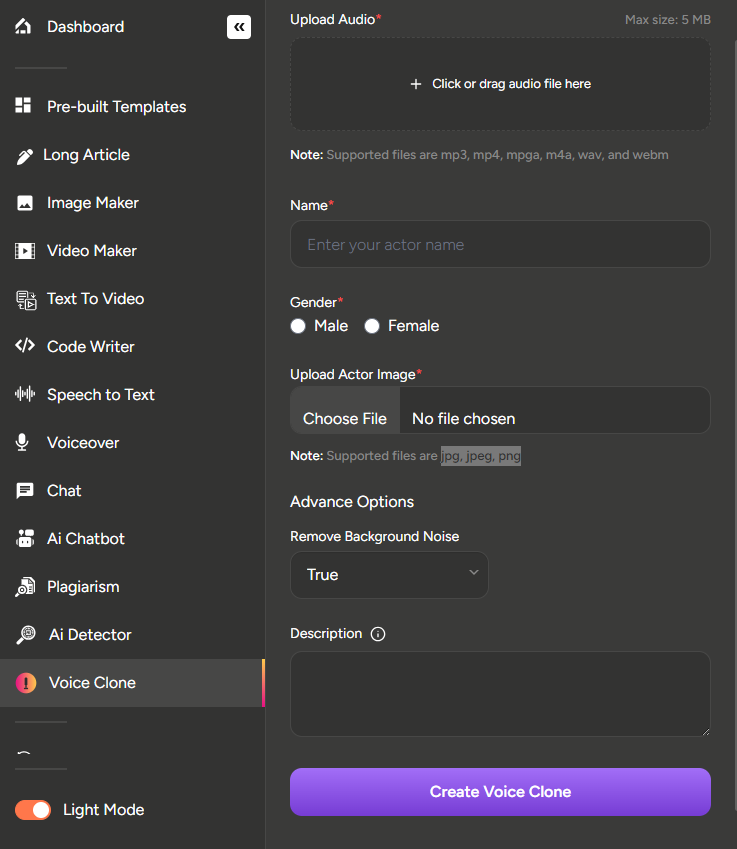
Voice Clone
The user has to navigate to Voice Clone menu in order to generate voices through cloning them. After navigating to the menu, the user has to upload an audio file which will determine the voice of the generated character. The user has to check the supported file types of the audio file which are mp3, mp4, mpga, m4a, wav, and webm. The user also has to keep an eye on the max size of the audio which can be configured by the admin from Configurations>General Settings>Preferences>Max File Upload Size.
Then the user has to provide a name to the generating character and select the Gender of that Character.
Moreover, the user has to upload the Character Image of the generating character. The user has to keep an eye on the available file types of the character image and upload a file within the available types which are- jpg, jpeg, png.
Finally the user has to select the Additional Options for the provider based on the admin preference. On the description section of the additional options, the user can provide the description about the generating character.
After making all the changes, the user has to click on the Create Voice Clone button in order to generate the voice.
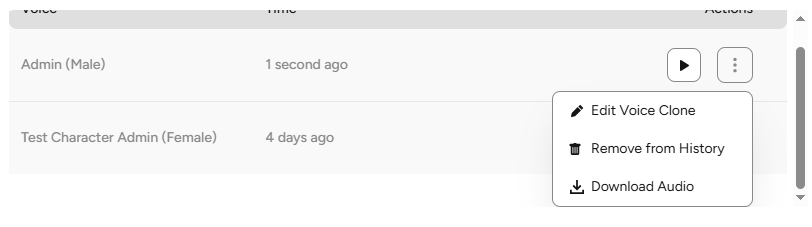
Generated voice related Operations
After a voice is generated, the user can play the voice where the user will be able to hear the generated voice audio. The user can also edit the generated voice, remove the voice from the list or can even download the voice as well.
Voice Edit Related Operations
On the voice edit page, the user can change the picture of the generated voice, change the name of the voice, select the gender of the voice and can even play the audio of the voice as well. After making the necessary changes, the user has to click on the Update Voice Clone button in order to update the voice.
